Place the gauge cluster face-down on a clean surface. Remove the eight brass-colored screws.

Carefully remove the back of the cluster, move the front clear plastic facing away and turn over the rear so the gauge faces can be seen.

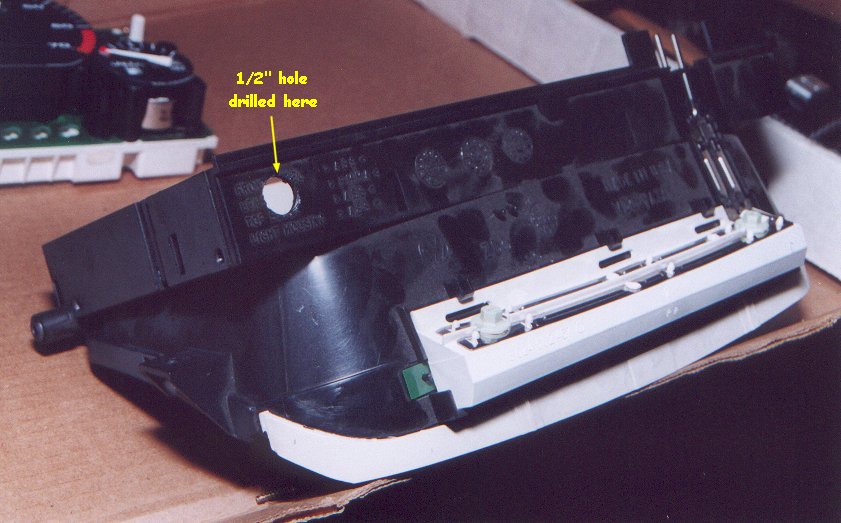
Drill a half-inch hole in the upper-left front housing. This is where the wiring will pass through for the RI gauges.
Securing the RI gauge faces to the stock faces is a matter of personal preference. Some people have used contact cement but I find that to be too permanent. I used double-sided carpet tape because it's very thin and very sticky. At a minimum you should secure the gauge face at three points. I put several pieces around the border as well as the center of the large gauges.
Carefully slip the RI gauge hole over the needle and push over the needle spindle. Don't worry if the needles move, they will move back to their "home" position when the car is started.

You can carefully move the needles through their entire range of sweep to make sure they don't rub on the RI face. If the needle does touch the RI face then you may need to reposition your tape or pull the needle up a tad from its spindle. This must be done very carefully. See the Advanced Gauge Lighting section for removing and installing the needles.
<Previous page> <Next page>