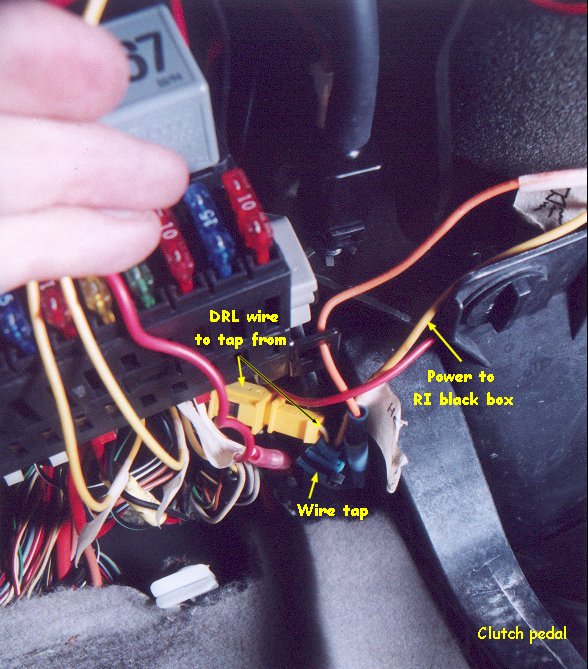
Providing power to the RI black box could be the most troublesome part of the installation process. The RI instructions say that power should be tapped from the parking light circuit. This is fine for most but I noticed that the RI gauges were not easy to read when on during the day. Since I will sometimes drive with my front fogs on during dawn/dusk my parking lights will be on as well (standard Euro light switch function). I wanted the RI gauges to light only when my headlights were on, thus conditions are dark enough to see them. Because I have disabled my DRLs (Day-time Running Lights) I could safely use that circuit (my alarm system flashes the headlights through this circuit as well).
I tapped into what I believe is the DRL wire, located at the end of the fuse/relay panel on the pedal side. See the Bentley wiring diagram 97-182, current path 26. It's a yellow and blue striped wire and can be identified by a yellow single-connector connection that has a solid yellow wire on the other end. This wire runs to the headlights and only has power when the ignition switch is on and the headlights are in the ON position. Remember, I am using a Euro light switch and my DRLs are disabled. If your DRLs are not disabled then your RI gauges will be ON whenever the car's DRLs are on.
Providing a ground is very easy. I connected my ground to the brown, round grounding hub located on the left side of the car, next to the fuse/relay panel. If you can't fit a female spade connector into an open spot you can just as easily tap into one of the existing wires since they are all ground.
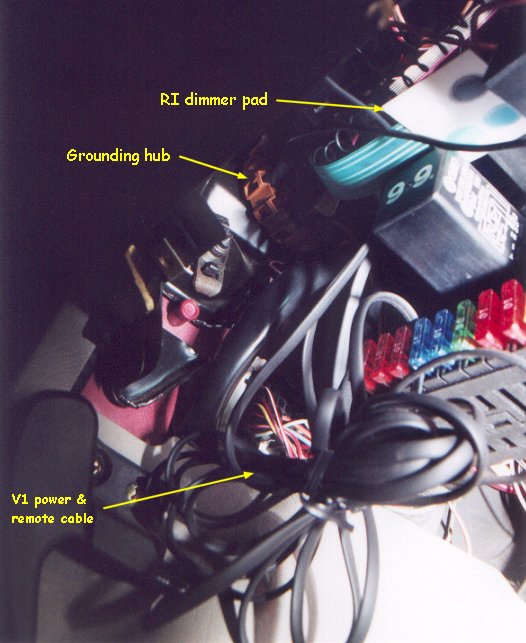
Secure the RI black box (RI power supply) to the stock gauge wiring harness. Route your power and ground wires up the firewall to the black box and be sure to label the wires -- you never know when someone else may be back there and you don't want them to mess up your work! I put my dimmer pad next to the fuse/relay panel. 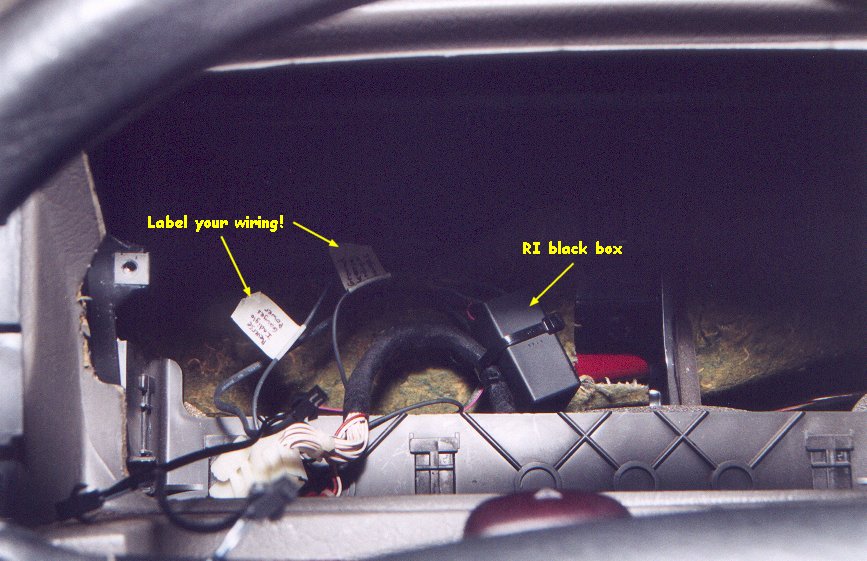
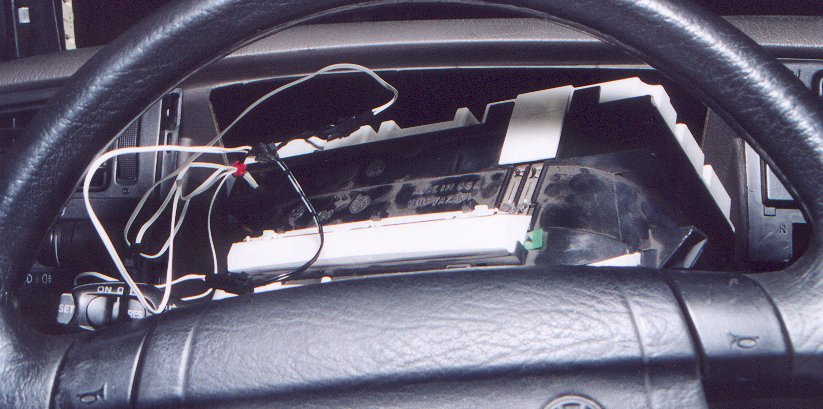
Fit gauge cluster partially back into the dash. Connect the RI gauge wires to the black box. Connect the red, then the white, gauge cluster wiring harness plugs into the back of the gauge cluster. Do not install the headlight switch yet! I was testing my install so I put the switch back in (then took the picture). After everything tested OK, I removed the headlight switch and then continued with the cluster re-install.
Push the lower gauge cluster pins back into their clips. Carefully push all the wiring behind the gauge cluster. Rotate the top up and to the front of the car, securing the cluster with the two retaining screws. Slip the cluster trim back in and secure with the two retaining screws. Clip the headlight switch to its wiring harness and push it back into the dash. Replace the remaining dash trim pieces. If your left trim piece is the airbag warning light, make sure you attach the wiring harness to it.
<Previous page> <Next page>