 Last additions - Zoom-zoom Last additions - Zoom-zoom |
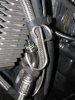
768 viewsAttach the Hypermotard line loosely to the engine. Remove the breather bracket from the front left side of the engine (5mm Allen wrench) and then remove the breather line from the bracket. Position the bracket on the existing oil line and insert the new line as shown.May 14, 2011
|
|
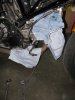
750 viewsRags in place to catch oil drippings and the Hypermotard line in position with the goofy bend end resting on the exhaust. Remove the top connection first. This way when you remove the bottom connection you can quickly move the stock line out of the way.May 14, 2011
|
|
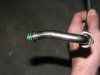
761 viewsThis is the end of the oil line that is connected to the output on the engine. Notice that goofy bend? That's what's needed for the line to clear the engine. The only tools needed are two 19mm open-ended wrenches, flat-bladed screwdriver, and a 5mm Allen wrench. Use one wrench to hold the connector nut and the other to remove/replace the oil line coupling nut.May 14, 2011
|
|
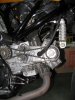
866 views...and the Hypermotard oil line path. Neat and tidy!May 14, 2011
|
|
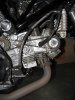
900 viewsStock path of the oil line...May 14, 2011
|
|
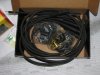
411 viewsA look inside. Two styles of 90-degree plugs and connectors. The 180-degree ends are already on the ends and ready for use.May 08, 2011
|
|
367 viewsJust the side of the box. CARB approved for those who have to care.May 08, 2011
|
|
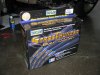
440 viewsWhat was available given the meager selection at the FLAPS which caters to the V8 and truck crowd. 500-ohms per foot is dang good when compared to what Accel wires had and the stock Ducati ones!May 08, 2011
|
|

452 viewsThe core is folded under the wire and the connector firmly crimped, ready for use.May 08, 2011
|
|

432 viewsHow the wire and core are positioned in the crimp.May 08, 2011
|
|

446 viewsHow the wire will be placed in the connector.May 08, 2011
|
|
429 viewsThe 90-degree boot is on the wire and ready to be slid down. As per the instructions, just a spritz (very light coat) of WD-40 really helps move the boot down the wire.May 08, 2011
|
|
418 viewsThe front coil. The dull black one to the left is the original Ducati plug wire and my new one is on the right.May 08, 2011
|
|
450 viewsShowing the left spark plug wire on the front (horizontal) cylinder. The Taylor kit came with dielectric grease which I smeared on the inside of both end boots. This helps keep moisture out and further insulates things.May 08, 2011
|
|
435 viewsJust a very slight bend in the plug wire.May 08, 2011
|
|
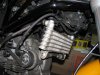
438 viewsI installed the new wire on the same path as the stock wire, just moved the zip-tie a little closer to the right so the wire wouldn't rub on the oil line fitting. I tried to position the wires from rubbing against any parts.May 08, 2011
|
|
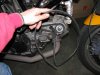
428 viewsPut the plug wire on the spark plug and figure out how long you need it. This was a short wire and I had half left over. Motorcycle spark plug wires tend to be shorter than your average V8.May 08, 2011
|
|
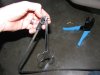
458 viewsSlipping the boot past the end of the wire can be a little tricky so hemostats are helpful in pulling. Remember to use some WD-40 to help lubricate the wire. The blue crimpers have an MSD die in them for crimping the connectors to the wires. May 08, 2011
|
|

482 viewsComparison of the incandescent bulb (left) and the LED replacement (right). Feb 23, 2011
|
|

In the raw comparison482 viewsComparison of the two bulbs. On the left is the standard incandescent and on the right is the LED unit.Feb 23, 2011
|
|
| 1529 files on 77 page(s) |
 |
20 | |
|





