 Most viewed - Passat HID install Most viewed - Passat HID install |
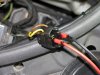
430 viewsThe bulb I originally had for the left side was bad so I got a replacement. This had the wires through it but no connector. Overall, it is better as there was no need for me to cut the wires, push them through the gasket, and butt-crimp them. For the connection, I pushed the spade connectors into the stock connector, dabbed liquid electrical "tape" around it to electrically insulate it as well as help hold the connectors, then wrapped the connector in electrical tape to further hold the connectors in. Not ideal at all but it works.
|
|
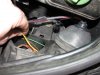
425 viewsGently pull on the brown and yellow wires to help keep the connector in its place when putting the rubber boot back on.
|
|

Before and after - street view423 viewsBefore - Low beams, standing next to the B-pillar and looking forward.
|
|
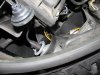
Right side422 viewsThis is the side I started on and passed the harness through the hard cover as recommended by a shop that does the procedure. What a MAJOR pain in the butt! Ideally, it would be best to REMOVE the airbox in order to get enough space to maneuver around; a much bigger task than I cared to do after 3 hours of work involved already! I have long thin fingers and trying to get the bulb in the socket, as well as the gasket into the hard cover, was quite difficult. Anyone with thicker and/or shorter fingers would likely have an even more difficult time as the space is just too cramped around that area.
|
|

417 viewsAfter - Low beams and fogs, standing next to the B-pillar and looking forward.
|
|
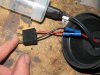
417 viewsBoth wires installed and ready to go.
|
|
Before and after - against the garage door416 viewsBefore - Low beams.
|
|
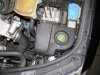
414 views
|
|
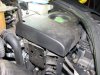
413 viewsThe decorative cover fits nicely over the unit, hiding it from view.
|
|
411 viewsAfter - Standing next to the B-pillar and looking forward.
|
|
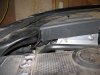
411 viewsThe cover back in place with room to spare. Keeps the engine bay looking tidy.
|
|
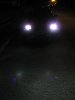
409 viewsAfter - Low beams.
|
|

407 viewsDrill a small pilot hole first then...
|
|
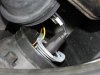
406 viewsThe original bulbs came with a plastic ring to help hold them in their shipping case. I split it and put it behind the bulb, then carefully pushed the bulb retaining tangs onto the plastic ring. This kept the tangs more even. Without them you'll need to push the tangs down a little bit as well as bend them inward in order to retain the bulb. I oriented the bulb just like the halogen it replaced, tab pointing up. No shadows were cast, full light is output.
|
|
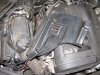
405 viewsI used the supplied double-sided tape to mount the electronics under the cosmetic cover. If you do this make sure you clean the mounting surfaces with rubbing (isopropyl) alcohol.
|
|
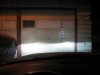
404 viewsAfter - Low beams.
|
|
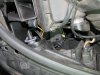
404 viewsHow it looks with the plug in place and the gasket ready for the hard cover.
|
|
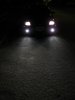
403 viewsBefore - Low beams and fogs, facing vehicle.
|
|
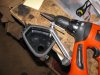
400 views...use a hole saw or reamer to enlarge to 7/8" diameter. This is where the gasket will mount and allow the wires to pass through.
|
|
399 views
|
|
|
|





