 Most viewed - How-to Most viewed - How-to |
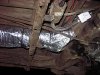
555 viewsView of the Y-section taken from the left side.
|
|
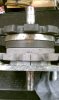
553 viewsIndexes all lined up. Ready for the case halves to be mated now.
|
|
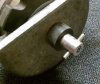
Reference: Rear gear box, front side.551 viewsFront side of rear gear box. Steel roll pin is 3/16" x 1-1/4". This is where the drive shaft fits.
|
|
548 views
|
|
Night example.548 viewsNight time example of turn signals. Also on YouTube.com at http://www.youtube.com/watch?v=uAUECRUXoQo&list=UUhzs41pIUb_YugBfXOWUwvw&index=3&feature=plcp
|
|
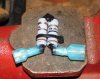
547 views...as can be seen here. I again used Plasti Dip to cover/protect the exposed wire. Use one female spade and one male spade connector. The female will be connected to the fuel gauge and the male will be connected to the brown with black stripe wire that goes to the fuel gauge sending unit.
|
|
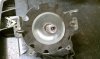
547 viewsThe repaired pin in place. Thin plastic washer goes between the gear (front and rear gears) and the case.
|
|
545 views...but now it is!
|
|
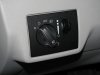
545 viewsNew fog-light equipped light switch. To operate simply push the dial in. Of course, you have to go to the *&$%! dealership to get it 'enabled'! Fogs automatically turn off when high beams are turned on, however, they remain on when using the "flash to pass" feature. Also, the 'system' remembers the position of the fogs so if you leave them on when you turn off the lights, they will automatically come back on when you turn the lights back on, including if you turn off the car.
|
|
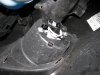
545 viewsRight fog bolted in.
|
|
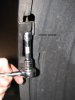
Mounting the LED array.543 viewsRemove the bolt that holds the bumper skin to the upper quarter panel (left side shown). It is above the two wheel well screws.
|
|
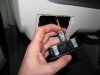
542 viewsNew light switch plugged in. See the red tab? It's in the 'unlocked' position...
|
|
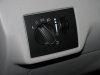
541 viewsStock, non-fog light switch.
|
|
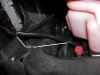
540 viewsWhere I zip-tied the left side of the harness. It comes down near the radiator over-flow container (the pink bottle). Don't use the aluminum object to the left, that's the heat-sink for the coils!
|
|
537 views
|
|
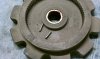
537 viewsAll the bearings are roller bearings and they are held in with the grease. When cleaning the grease and wiping the bearings they will most likely fall out so work over a soft, plush towel to keep them from bouncing away. Pack the bearings and cage surfaces with fresh grease and slip any fallen bearings back in. You should see no gaps between the bearings. Pack more grease in when they're all in and roll them around with your finger to spread the fresh grease around. It will hold them in there.
|
|
534 views
|
|
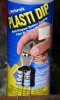
534 viewsI used "Plasti Dip" over the joint as it's an electrical insulator and will protect the joint. It's thick and simply paints on.
|
|
532 views
|
|
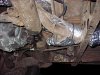
532 viewsI wasn't able to fully wrap this piece. It was a real pain to get the insulation on top of it. Since it is already insulated from the factory I didn't worry much about cutting up some insulation and wrapping the bottom. Maybe at a later date. Notice that I did put an 18" sheet across the top of the heat exchanger ducts that go over the torsion housing. What a pain in the neck! Trying to wrap this section wasn't worth it, with the tubes, guides, wires, and shifter parts all in the way -- very busy area!
|
|
| 334 files on 17 page(s) |
 |
7 | |
|





