 Most viewed - Zoom-zoom |
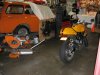
788 viewsMy two favorite toys. The engine is out of my baby in prep for the 2010 Type Three Invasion in Missouri.
|
|

788 views
|
|

4788 viewsCut out the plastic lip from the covers. This allows the cover to be placed back on and turned, helping to keep water and dust out of the light housing.
|
|

5787 viewsUse a sharp blade to score the plastic. This will allow the plastic to break away easily.
|
|
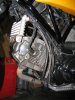
781 viewsFinished view from the left side.
|
|

780 views
|
|
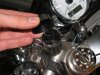
779 viewsPut a sheet of plastic wrap, like Saran-wrap, over the rubber plug...
|
|

776 viewsSo what do you do with the stock clutch cover? Well, you NEVER throw away good parts! Keep them for the next owner or recycle them -- that means you give them to a friend in-need or sell them. Personally, I used mine for a cereal bowl...
|
|

775 viewsUhg, look at the left front axle slider...stickin' out like a wart :-(
|
|
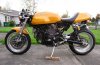
772 viewsDifferent views of the product.
|
|
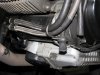
770 viewsClose-up of the front view installation. Nice and neat, eh?
|
|
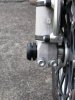
Front axle slider is for SS/916/999/Monster767 viewsRight side. Slider fits in axle tube nicely.
|
|
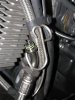
765 viewsAttach the Hypermotard line loosely to the engine. Remove the breather bracket from the front left side of the engine (5mm Allen wrench) and then remove the breather line from the bracket. Position the bracket on the existing oil line and insert the new line as shown.
|
|

762 viewsMe explaining to the kids not to touch daddy's new toy because it's worth a LOT of their toys.
|
|
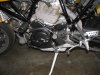
762 viewsInstalled, bled, and ready for use!
|
|

Left side761 views
|
|
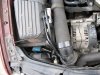
9761 viewsRight [passenger] side ballast/ignitor affixed to airbox top.
|
|
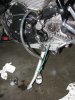
761 viewsUse an 8mm open-ended wrench to crack open the bleeder nipple when bleeding the clutch slave. I used clear tubing, bungeed to the kick-stand, and let it drain into a glass container. I bled my system until fresh fluid appeared. Remember to keep an eye on the reservoir! Oh yeah, you no longer need the plastic wrap cover. When done, make sure the reservoir is about 3/4 full, then insert the rubber boot and secure the cap.
|
|
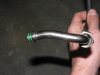
758 viewsThis is the end of the oil line that is connected to the output on the engine. Notice that goofy bend? That's what's needed for the line to clear the engine. The only tools needed are two 19mm open-ended wrenches, flat-bladed screwdriver, and a 5mm Allen wrench. Use one wrench to hold the connector nut and the other to remove/replace the oil line coupling nut.
|
|
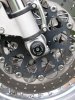
757 viewsRight side. Lookin' good!
|
|
| 1529 files on 77 page(s) |
 |
10 | |
|





