 Most viewed - Zoom-zoom Most viewed - Zoom-zoom |
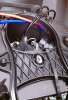
523 viewsFirst zip-tie installed. I waited on the second one so I could move the ballast a little while working on the electrical cabling. This just helps get the ballast out of the way and keeps it from moving around too much. You can now install the HID bulb and secure it.
|
|
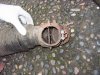
522 viewsHere is the flapper box that sits above the heat exchangers. This is the closed position so all air exits out the "bell" (right-most part of the flapper box) and into the atmosphere. Air is always flowing through the heat exchangers -- it just goes into the interior or vents to the outside.
|
|
Done!522 views
|
|
521 views
|
|
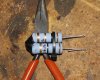
521 viewsI used a small zip-tie to keep the resistors together while working on them. Not critical to have but makes the pack more sturdy and easier to handle. You can also see that I bent the wires back on themselves, essentially making them thicker. This allowed me to crimp spade connectors to them...
|
|
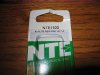
521 viewsHere's the VR (voltage regulator) information. This is what you need. I got mine for $3.15 at Norvac Electronics, Inc. You can also get it at Fry's. NTE1932, IC voltage regulator, positive 10-volts, 1-amp.
|
|
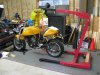
521 viewsI used my engine hoist to lift my bike by the frame. I'm so glad I have this! This was necessary to get the full extension sag measurement as well as lifting the bike to take pressure off the lower bolt so it could be removed.
|
|
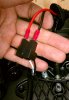
521 viewsPush in the power supply spade connectors into the headlight connector. As can be seen in the picture, I put the black wires together and the red wire with the white wire.
|
|
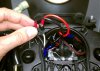
521 viewsPush the power supply wires into the original headlight bulb connector.
|
|
520 views
|
|
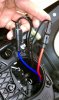
520 viewsConnect the ignitor wires to the bulb. One thing I did to make this wiring install easier is to remove the weather seal that holds the 4 wires. Since everything is contained within the headlight bucket there's no need for the wiring seal. Carefully use a sharp blade, like a crescent X-acto blade, to cut the seal and remove the wiring.
|
|
519 views
|
|
519 views
|
|
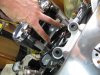
519 viewsMy fingers are pointing to the two pins that fit into the two rubber grommets that are part of the upper triple tree (visible in the foreground).
|
|
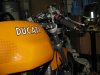
...after.519 views
|
|
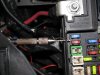
Connecting the DRL LED array.519 viewsI used a hand drill with a 2mm drill bit (smallest I had) to carefully drill a pilot hole into the side of the relay box. The pilot hole is 7mm down from the top of the lip of the fuse/relay box. It's between fuses M20 and M27.
|
|
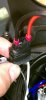
519 viewsFor safety I wrapped each connector in electrical tape and then wrapped them together as well.
|
|
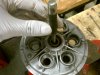
518 viewsUse a drift to tap out the push rod.
|
|
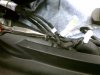
518 viewsRemoving the one-way retaining washer is a pain in the butt. Chances are very good that you could end up breaking the pin...not that it's a big deal if that happens, honestly. I did this on the left side to remove the turn signal electrical connector away from the rest of the harness, then pushed the retainer back on.
|
|
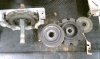
518 viewsLeft to right: Rear of gear box with rearward ring, laying on table is planetary ring, behind that is the forward ring, and behind that is a thin plastic washer.
|
|
| 1529 files on 77 page(s) |
 |
23 | |
|





