 Most viewed - Zoom-zoom Most viewed - Zoom-zoom |
485 views
|
|
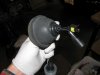
485 viewsSeat the wiring gasket as so...pretty dang obvious. How it should look.
|
|
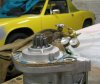
484 viewsAnother shot & ready to go into the yellow 914 you see in the background :-)
|
|

484 viewsComparison of the incandescent bulb (left) and the LED replacement (right).
|
|
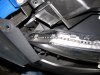
484 viewsShowing the path of the LED array as it goes down on the front part of the head light. That blue thing is simply a nylon auto trim tool I had laying nearby that I used to hold the fascia away from the head light so I could work with both hands. Now just apply power from the turn signal tap!
|
|
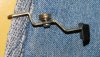
483 viewsIn case you drop the parts, here's how the bits go together. The washer goes on the screw and then the screw goes into the lever and the bushing. The flat side of the bushing faces the thumb pad.
|
|
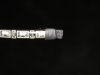
LED dual-element array (alternating white and amber LEDs).483 viewsCut the other end to the desired length or to simply remove the other wires. Use some heat-shrink at the end to seal it from the elements. I left a little over-hang and then bent the heat-shrink back on itself, then gently clamped with some needle-nose pliers.
|
|
482 viewsLined up.
|
|

In the raw comparison482 viewsComparison of the two bulbs. On the left is the standard incandescent and on the right is the LED unit.
|
|
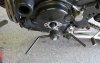
482 viewsThe turning tool screws in snugly and easily lets you rotate then engine to get the pulleys to TDC (Top Dead Center).
|
|
482 viewsPlanetary gear in position and pin marked where it needs to be cut.
|
|

481 views
|
|
481 views
|
|
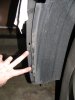
481 viewsRemove the two screws that attach the wheel well splash guard to the front bumper skin (left side shown).
|
|

481 viewsI used the hole in the pressure plate...
|
|
480 viewsShoulder portion of belt locked in place.
|
|
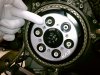
480 views...to mate with the notch in the one clutch spring post. I seriously don't think it matters but I tried to follow the workshop manual instructions as closely as I could, just in case.
|
|
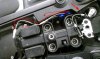
480 viewsThe pigtail length I used was 35mm and the red line shows how it's laid inside the seat pan with the resistor wires coming in an OEM hole (arrow) and spliced into it. This is all hidden by the "tool tray". I could've shortened it by a couple centimeters but it works as is.
|
|
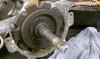
480 viewsRearward gear with original grease. The "B" means back lift box.
|
|
479 views
|
|
| 1529 files on 77 page(s) |
 |
29 | |
|





