 Most viewed - Zoom-zoom Most viewed - Zoom-zoom |
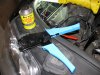
The install460 viewsLiquid electrical tape used to fill in and insulate crimps. High-quality ratcheting crimpers make the difference!
|
|
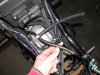
460 viewsHere's the hoses merged together. Cut the bleed hose about 6" down and insert the horizontal part of the tee. Connect the 8" hose. Done!
|
|
460 views...to release it from the split shaft below, making it easy to remove the entire pin assembly without breaking it.
|
|
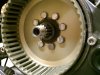
460 viewsNow remove the 4 bolts, apply thread locker, and install the 8 bolts according to the workshop manual. The local Ducati dealership said it would be perfectly fine to reuse the bolts. I had to hold the clutch basket and torque down the bolts...it was NOT easy! I had no tool to hold it. Next time I'll get a tool or hold the basket and have someone else torque the bolts. I originally removed the bolts with my air gun so there was no need to hold the OEM basket.
|
|
459 views
|
|

459 views8 cylinders backing up (6.55MB)
|
|

459 views
|
|

459 views
|
|

459 viewsThough you can watch the video here, it's awfully big so I suggest going to my YouTube page here: http://www.youtube.com/watch?v=ozZp4sLwWhA
|
|
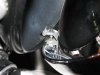
459 viewsThis shows where the retaining clip will rest. Simply put the top of the headlamp ring on the lip of the headlamp bucket and pivot the bottom section down. Make sure the retaining clip fits inside the bottom of the headlamp bucket and then gently push the bottom of the headlamp towards the bike body. Snug retaining screw to secure headlamp but don't over-tighten!
|
|

458 viewsAntonette, at 5'8", next to the little vixen as a height reference.
|
|

458 views
|
|
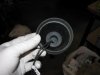
458 viewsThe interior.
|
|
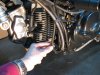
458 viewsThis is the drainage hose that I'm removing. I'm just going to tee it into the existing bleed hose, that's all.
|
|
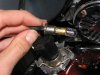
458 viewsThe stock incandescent bulb. Boooo!
|
|

458 viewsOEM DRL on.
|
|
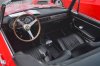
457 viewsHer interior.
|
|

457 viewsPop-top up, giving lots of standing room AND sleeping space!
|
|
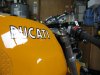
Before...457 views
|
|
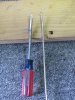
457 viewsI used the pick to pull back the OEM wire bale that holds the female connector to the injector. The small screwdriver is then used to keep the bale from snapping back while pulling the bale further out with the pick.
|
|
| 1529 files on 77 page(s) |
 |
34 | |
|





