 Most viewed - Zoom-zoom Most viewed - Zoom-zoom |

433 views
|
|

433 views
|
|
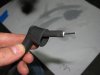
433 viewsThe 90-degree boot is on the wire and ready to be slid down. As per the instructions, just a spritz (very light coat) of WD-40 really helps move the boot down the wire.
|
|

433 viewsJust after sunset. At the time I took these pictures it was brighter out than what appears in the images. The LEDs are bright enough to the camera that it used a faster shutter speed, thus making the image look darker than it really is.
|
|

433 views
|
|

433 viewsLow beams on.
|
|

432 views
|
|
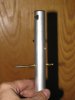
432 viewsThe end result of the drilling. Yes, the hole is perpendicular.
|
|
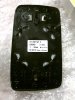
432 viewsThis is the back side (duh) of the HEATED, WIDE-ANGLE mirror for the left side-view mirror. This fits the North American vehicles perfectly! Remember to push the electrical connectors on/off several times so they make metal-to-metal contact and coat with a dielectric grease to slow corrosion.
|
|

431 viewsAnother group shot.
|
|
431 views
|
|
431 views
|
|
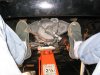
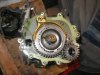
431 viewsNew tranny going in the opposite way it came out. This was my view of wiggling and pushing the tranny into the car, trying to get the lower engine studs to pass through the tranny bell-housing holes as well as having the splines line up on the tranny input shaft.
|
|
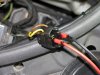
431 viewsThe bulb I originally had for the left side was bad so I got a replacement. This had the wires through it but no connector. Overall, it is better as there was no need for me to cut the wires, push them through the gasket, and butt-crimp them. For the connection, I pushed the spade connectors into the stock connector, dabbed liquid electrical "tape" around it to electrically insulate it as well as help hold the connectors, then wrapped the connector in electrical tape to further hold the connectors in. Not ideal at all but it works.
|
|
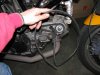
431 viewsPut the plug wire on the spark plug and figure out how long you need it. This was a short wire and I had half left over. Motorcycle spark plug wires tend to be shorter than your average V8.
|
|

431 viewsParking lights on.
|
|
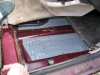
430 viewsSecond layer under right front carpet. Each cell is filled with sand. Pad is not bonded to the pan, it's simply laying there.
|
|
429 views
|
|

429 viewsUpper sleeping area inside pop-top has room for two adults as well!
|
|
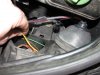
429 viewsGently pull on the brown and yellow wires to help keep the connector in its place when putting the rubber boot back on.
|
|
| 1529 files on 77 page(s) |
 |
40 | |
|





