 Most viewed - Zoom-zoom |

410 viewsLamborghini SUV.
|
|
410 viewsAfter - Low beams.
|
|
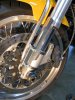
410 viewsPut the guard in position, put a drop of blue Lok-tite on the bolts, and tighten them up to the point of barely touching the protector.
|
|

Close-up410 viewsNo sprocket cover.
|
|

409 views...and her dash.
|
|

409 viewsAfter editing. More car, less ugly distractions :-)
|
|

409 views
|
|

409 viewsDrill a small pilot hole first then...
|
|

408 views
|
|

408 viewsAntonette next to a Lotus. Nice looking cars.
|
|

Close-up408 viewsDucabike with carbon-fiber insert.
|
|

407 views
|
|

407 views
|
|

407 viewsI'm not a fan of the spare tire on the nose but I guess it's better than in the stock spare tire well at the rear of the cabin.
|
|
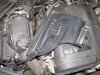
407 viewsI used the supplied double-sided tape to mount the electronics under the cosmetic cover. If you do this make sure you clean the mounting surfaces with rubbing (isopropyl) alcohol.
|
|

407 views
|
|

406 viewsNew firewall shifter bushing installed (soak in BOILING HOT WATER for ~30-60 seconds, place in hole, put a 24mm socket against it, and hit with hammer). The vice-grips greatly helped get the cabin shift rod into the under-engine shift rod joint.
|
|

406 views
|
|
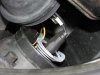
406 viewsThe original bulbs came with a plastic ring to help hold them in their shipping case. I split it and put it behind the bulb, then carefully pushed the bulb retaining tangs onto the plastic ring. This kept the tangs more even. Without them you'll need to push the tangs down a little bit as well as bend them inward in order to retain the bulb. I oriented the bulb just like the halogen it replaced, tab pointing up. No shadows were cast, full light is output.
|
|
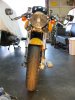
406 viewsHere's my bike, before installing the fork protectors.
|
|
| 1529 files on 77 page(s) |
 |
44 | |
|





