Modified Brake Light Procedure by Toby Erkson
Note: This works on '94 and some '95 only. Some time in '95 the wiring changed...
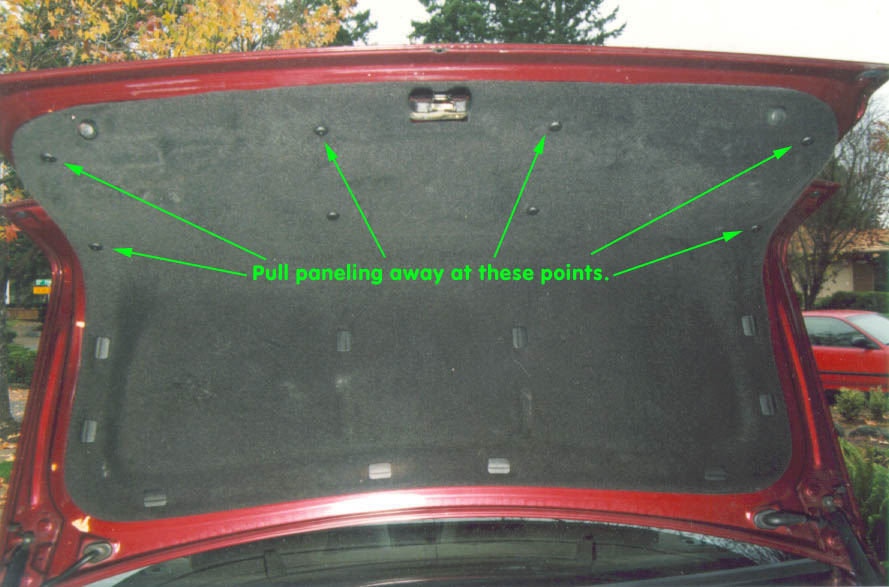
- Open the trunk and pull away the interior paneling/liner. I found it easiest to just carefully pull the paneling away using a small bladed screwdriver to help coax the paneling over the button.
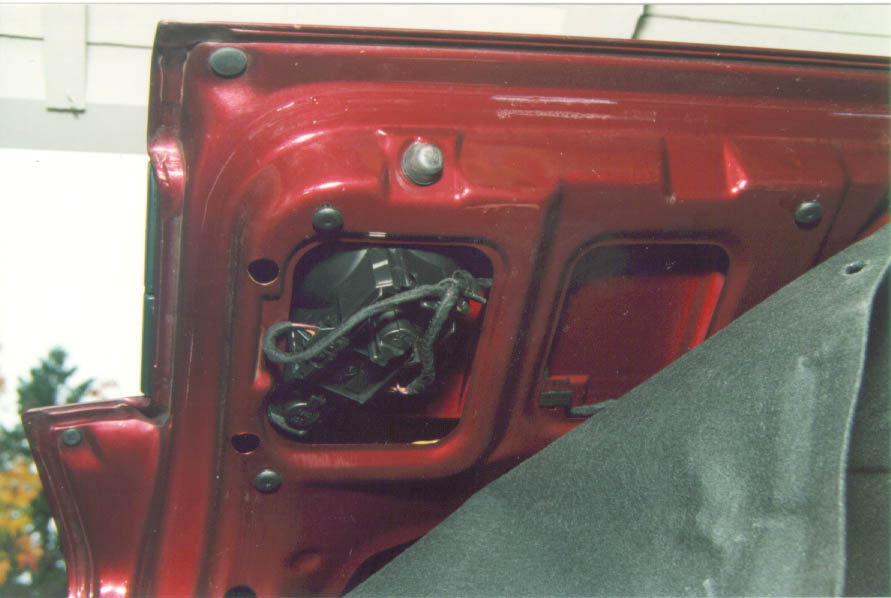
- This is what the trunk tail light assembly looks like. If you wish you can unclip the wires leading to the assembly, just remember to put them back in the right locations when you're done!
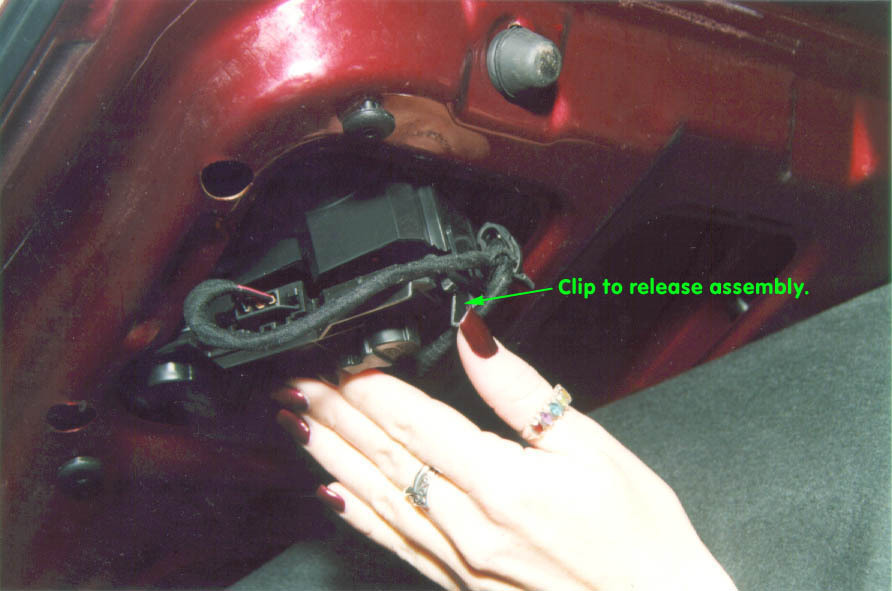
- Remove the "circuit board" from the housing by gently pushing the clip back and carefully pivoting it down. The reverse light bulb will be visible; carefully pull the circuit board down.
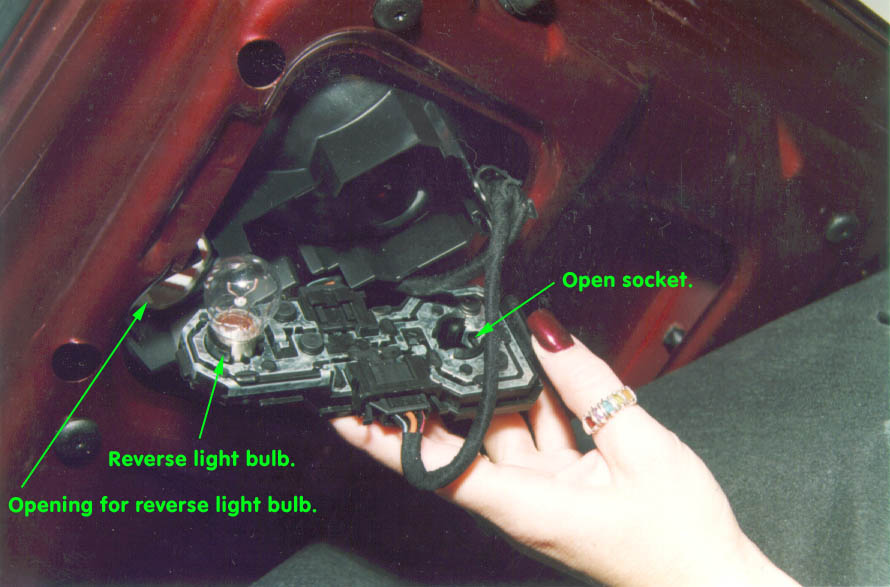
- The open socket will be readily visible once the circuit board is down, as well as the covered location where the hole will be drilled.
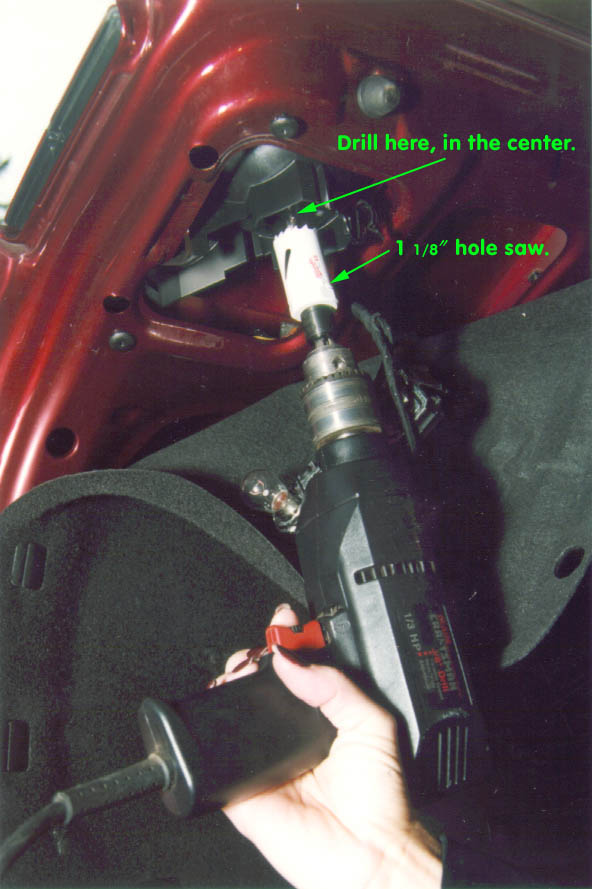
- Use a 1 1/8" hole saw to drill the hole. You need to have the type that has a drill bit in the center of the hole saw so the drilling will be centered and easy. The plastic is thin so drill firmly and carefully. If you press too hard you may enter into the housing too far and damage the lens. Once the hole is open clean out the debris inside the housing and smooth the edges (a wood file works well).
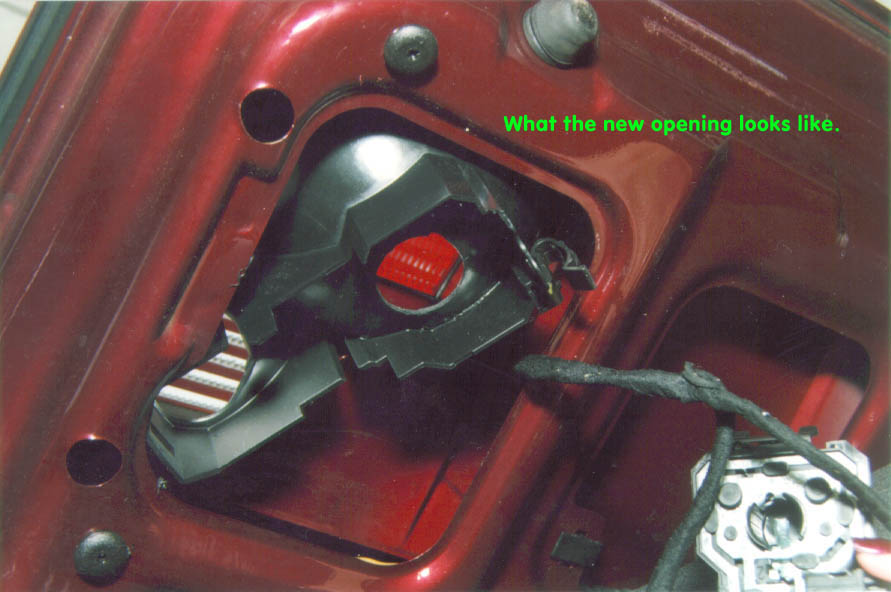
- This is what the new opening will look like. Nothing special here!
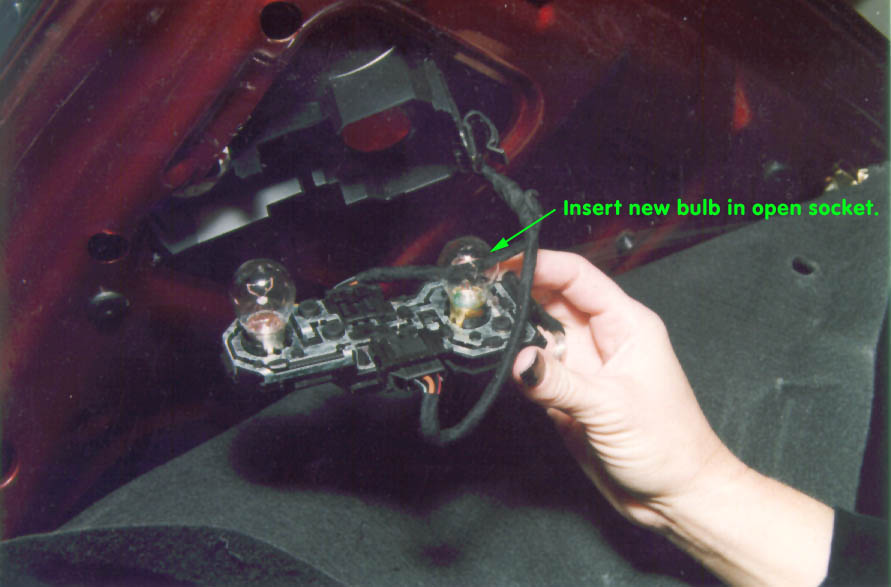
- Place a new bulb in the open socket. A bulb just like the reverse light bulb will work. Replace the circuit board back into the housing, reversing the process you used to originally remove it. Make sure you test your 'new' brakes to insure the bulb is working. If it is working then repeat this process for the other side.
- Once both sides are done replace the interior panel. The small bladed screwdriver helps in easing the paneling over the retaining buttons. Close the trunk because you're done! Now you have an extra set of bright brake lights!
End of Document