After-market fog light installation by Toby Erkson
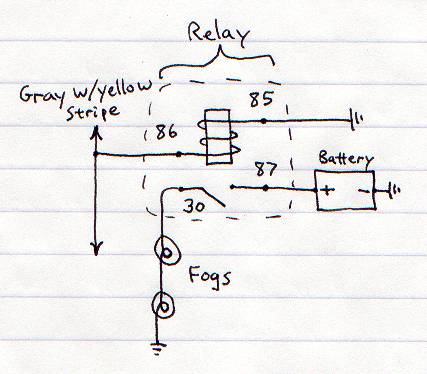
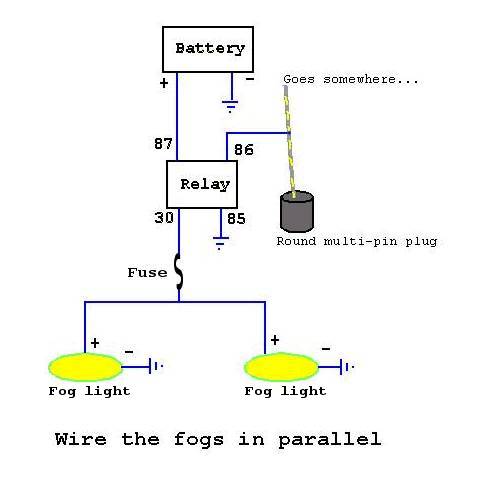
I mostly use these in fog and in the back hills to illuminate the sides of the road. They are switched via the Euro light switch. I replaced the 55-watt H3 bulbs with 100-watt units. Naturally, because they now pull more power I installed a relay. Thus, the Euro light switch simply supplies power to the relay coil whereupon power is then fed directly from the battery to the fogs.
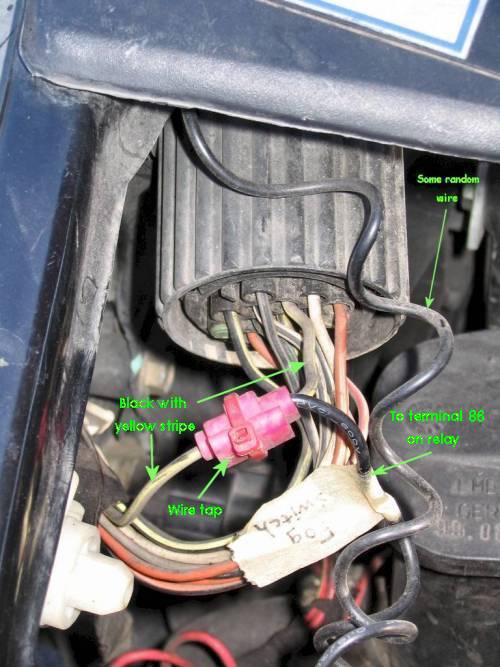
The fog switch power wire is in the engine compartment and you simply wire tap into it. It can be found going into the big, round multi-terminal located between the left headlight and radiator, top of the engine compartment. It's grey with a yellow stripe. Wire tap (splice) a wire to it and connect the other end to your relay.
If any of this doesn't make sense then have someone else do it because it'll save you the frustration. It's super easy to do from an automotive electrical standpoint.
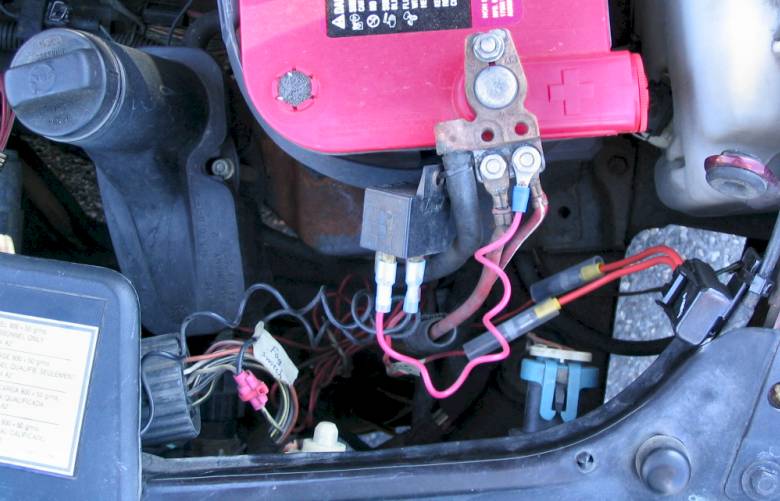
How it looks in the engine bay...nothing special.
Clicking on one of the below images will enlarge it.
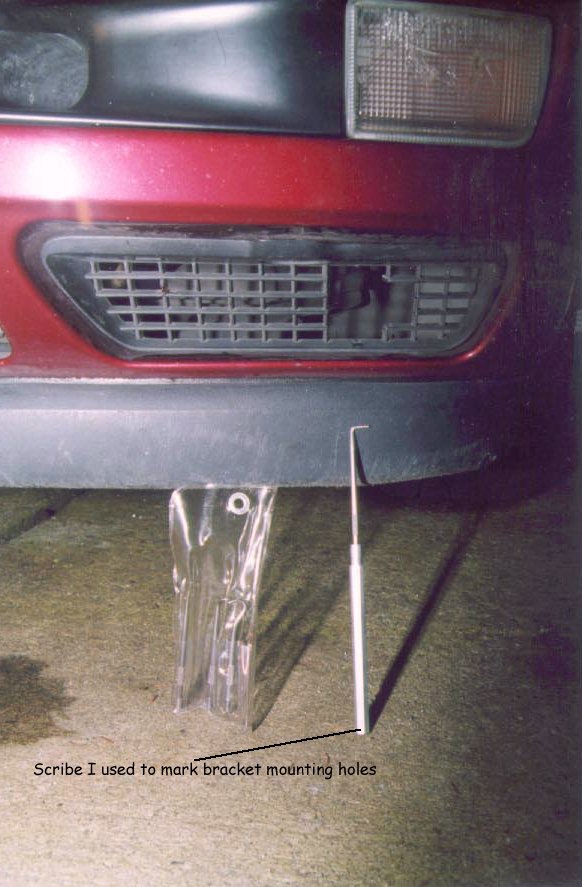
Hole made in brake ducting grill. Wire cutters easily cut the plastic grills.

Removing these are a bit tough. Becareful as the upper retaining plastic pieces may break (not a big deal, though).
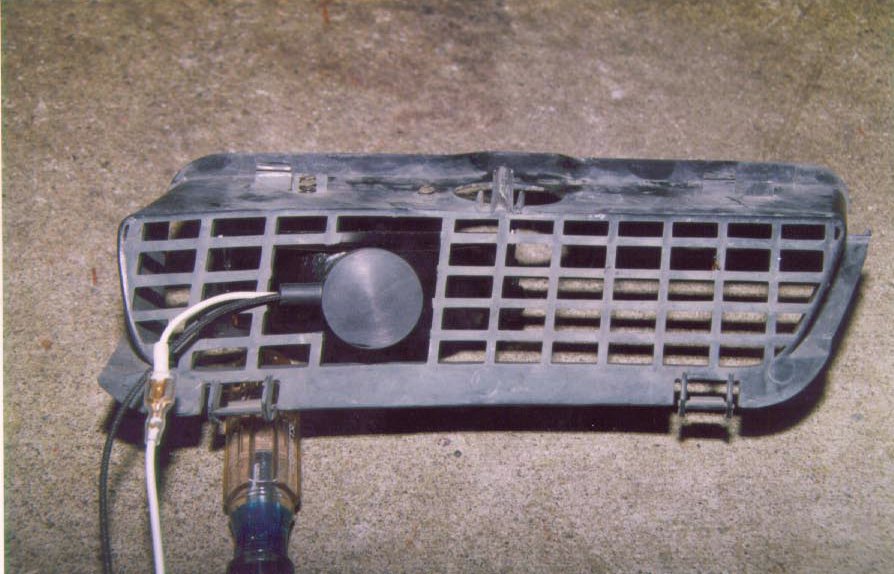
Back side view of installed 55-watt fog assembly.
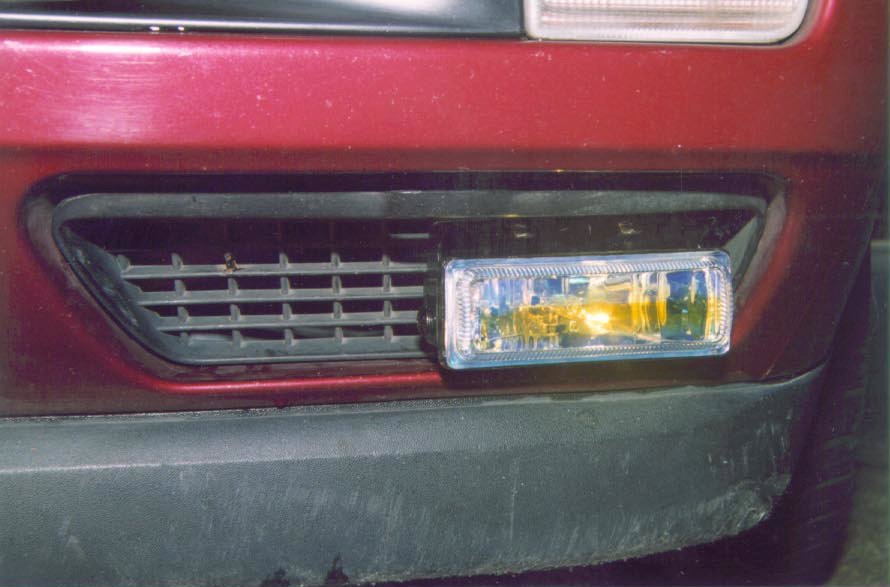
Installed. The yellow band is due to light reflecting out of the fog lens. The glass is clear but has a coating on it so light passing through it will be amber.

Differences in lighting. With all lights off only the street lamp was visible...such are the differences 'tween the camera and the eye!
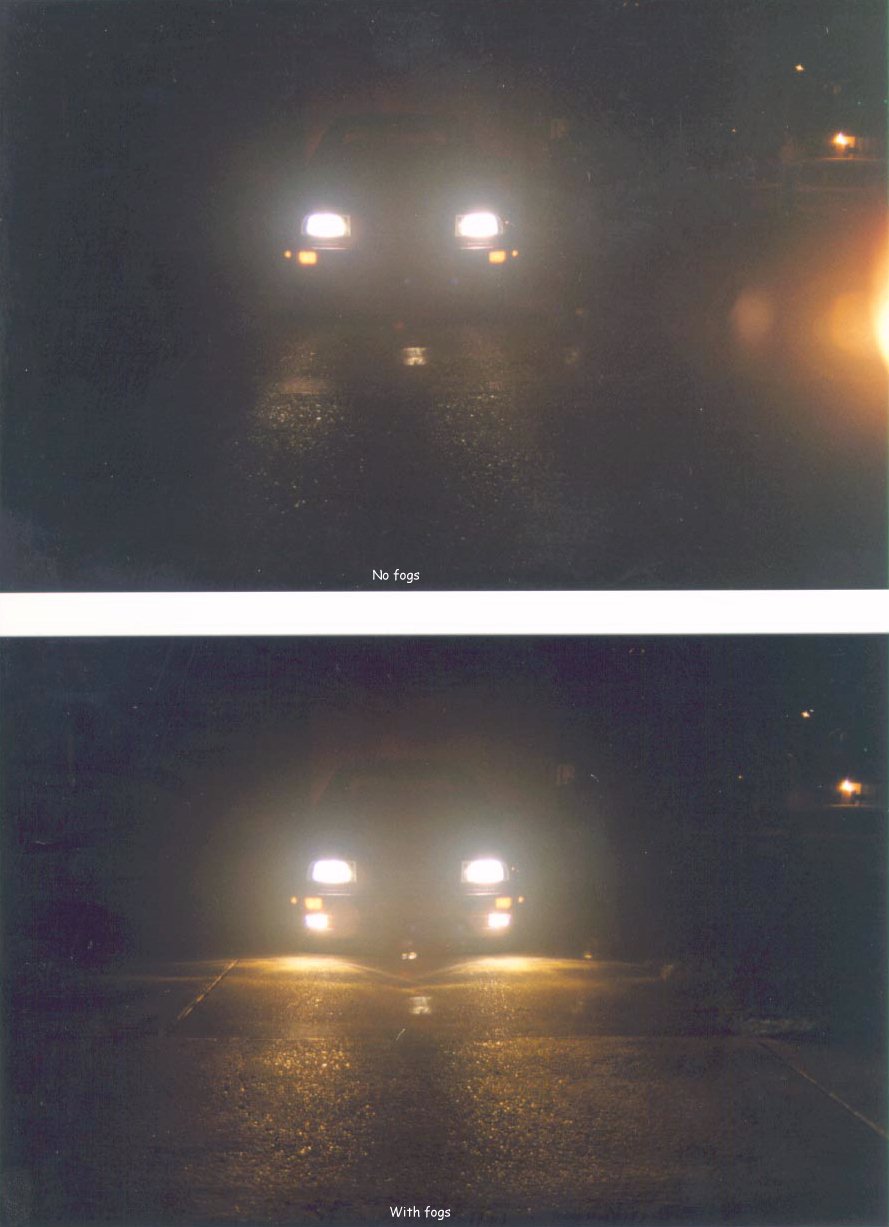
How oncoming traffic will view me. The light the fogs cast is amber.
These are no longer on my car...can't remember when I took them off but it's been a couple years as of this date. 14March2009