Here's a [crappy] image of the 6" UV neon lamp I bought at G.I. Joes in their automotive ricer section. It was inexpensive and plugs into the cigarette lighter.
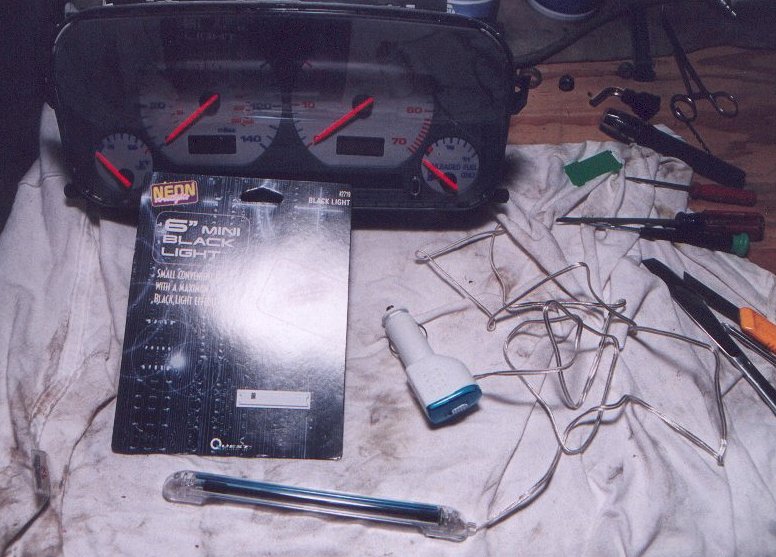
Here you can see where the neon lamp will sit and the power and ground wires exposed from the plug-in. You will need to disassemble the plug-in and expose the power and ground wires. You need to keep the plug-in because it has the necessary electronics in it to power the neon lamp.

Use RTV (silicone sealant) to secure the neon lamp to the top of the gauge cluster. Make sure the lamp is directly over the light openings.

After seeing that there was light drop-off at the top of the gauges (and two LCD filters was just too much) I had to remove my cluster and open up the light openings. Illustrated is roughly what I did. The material you remove will not be visible -- you won't see the opening -- and it will allow more UV light to reach higher up on the large gauge faces, thus illuminating the needles more when they reach the 12 o'clock position. Don't remove too much material or you will see the openings. If unsure, leave the openings alone and you will see what I mean when things are glowing at night. Then you can remove the gauge cluster and open it up more since removing the cluster is quite easy.
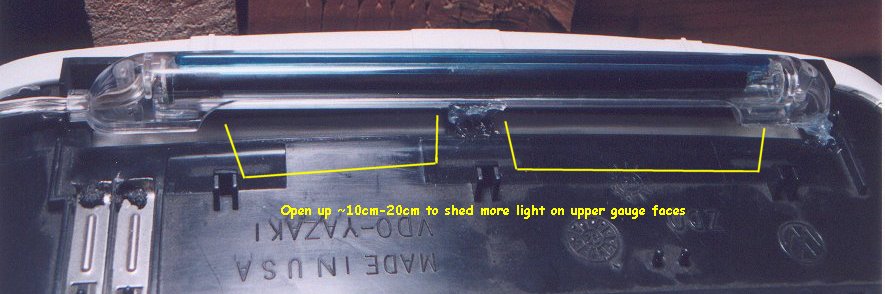
Allow the RTV to dry before installing the gauge cluster back into the dash. Power should come from the same location you use to illuminate the RI gauges. This way the neon lamp is only used when the gauges are lit and thus extends its life. The nice thing about day-glo paint is that it will 'glow' during the day because the sun is an excellent source of UV light, even on cloudy days.
<Previous page> <Next page>