 Most viewed - Ducati Most viewed - Ducati |
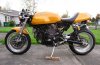
769 viewsDifferent views of the product.
|
|
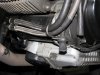
768 viewsClose-up of the front view installation. Nice and neat, eh?
|
|
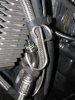
765 viewsAttach the Hypermotard line loosely to the engine. Remove the breather bracket from the front left side of the engine (5mm Allen wrench) and then remove the breather line from the bracket. Position the bracket on the existing oil line and insert the new line as shown.
|
|
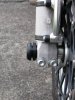
Front axle slider is for SS/916/999/Monster763 viewsRight side. Slider fits in axle tube nicely.
|
|

762 viewsMe explaining to the kids not to touch daddy's new toy because it's worth a LOT of their toys.
|
|

Left side761 views
|
|
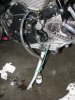
760 viewsUse an 8mm open-ended wrench to crack open the bleeder nipple when bleeding the clutch slave. I used clear tubing, bungeed to the kick-stand, and let it drain into a glass container. I bled my system until fresh fluid appeared. Remember to keep an eye on the reservoir! Oh yeah, you no longer need the plastic wrap cover. When done, make sure the reservoir is about 3/4 full, then insert the rubber boot and secure the cap.
|
|
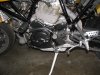
759 viewsInstalled, bled, and ready for use!
|
|
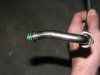
758 viewsThis is the end of the oil line that is connected to the output on the engine. Notice that goofy bend? That's what's needed for the line to clear the engine. The only tools needed are two 19mm open-ended wrenches, flat-bladed screwdriver, and a 5mm Allen wrench. Use one wrench to hold the connector nut and the other to remove/replace the oil line coupling nut.
|
|
Monoposto swingarm756 views2006 SportClassic 1000 single-seater
|
|
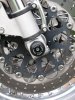
755 viewsRight side. Lookin' good!
|
|
754 views
|
|
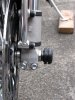
753 viewsLeft side does not fit in axle tube as the tube is a little smaller. It's small enough that it's really not noticeable to the unknowing eye. I know it doesn't fit exactly so, of course, I notice it.
|
|
748 views
|
|
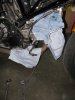
747 viewsRags in place to catch oil drippings and the Hypermotard line in position with the goofy bend end resting on the exhaust. Remove the top connection first. This way when you remove the bottom connection you can quickly move the stock line out of the way.
|
|
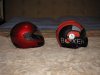
Right side745 views
|
|
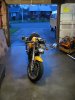
743 viewsSafe and sound in her new home.
|
|
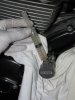
743 viewsOnce the clutch slave is bolted down (10 ft-lbs) pre-fill with DOT-4 brake fluid. I used a syringe and found 6cc to be enough to reach the bottom of the threads. Next, remove the banjo fitting from the stock unit and put it on the new one, torquing it down to 23 ft-lbs.
|
|

742 views
|
|
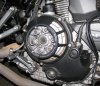
741 viewsClose-up. The body is metal, the clear cover is a thin plastic material (thin and flexible) and those four forward slots you see are openings.
The sound of the clutch is now quite audible! The stock clutch cover does a good job at keeping the clutch noise down. If you don't like the dry clutch "music" then keep the stock clutch cover on the bike.
|
|
| 428 files on 22 page(s) |
 |
6 | |
|





