 Most viewed Most viewed |
668 views
|
|
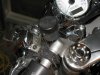
666 views...and screw the cap back on. This will help keep the DOT-4 fluid from flowing out when you remove the banjo fitting from the stock unit.
|
|
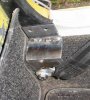
664 viewsHere's the lower outside mount and new bracket, mounted to the old stock location. This is shown for illustration purposes -- you need to mount the retractor first, then the bracket to the body.
|
|
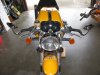
Skully grips by Driven664 viewsBefore. Stock grips.
|
|
658 viewsEatting a pop-sickle...passing time...
|
|
658 viewsPer's favorite sign.
|
|
657 viewsPretty cover snapped on.
|
|
657 viewsOther angle.
|
|

655 views
|
|
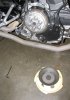
654 viewsThe four bolts are removed and the cover is on the ground (it's resting on a foam Frisbee). Notice that the bolts are different lengths so make sure you put them back in the same holes. You can also see the clutch dust in the cover and on the exhaust pipe.
|
|
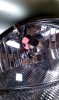
651 viewsLooking that the bulb reflector/cover from the front of the headlight. Use the eraser end of a pencil through the opening to GENTLY push the reflector forward -- towards the headlight glass -- so the HID bulb won't touch it. Every panel on the reflector is EASILY bent so take your time and GO SLOWLY! You want to push from the center of the reflector and just a couple millimeters. Test fit the HID bulb and gently wiggle it around, feeling that the tip doesn't touch the reflector.
|
|
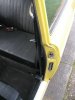
645 viewsNow that's what I'm talkin' about! Clean!
|
|
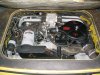
644 viewsNice rebuilt fuel injected engine. Automatic kick-down switch missing and she's going to need a new cold-start injector/harness as the previous one was *melted* :-(
|
|
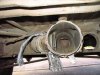
640 viewsLooking forward, this is the point where the main heater duct connects to the forward 'Y' where some heat can be diverted to the interior floor vent that is between the driver/passenger seats that points into the center of the Bus. Here the flap is closed so all heated air goes to the front of the Bus.
|
|
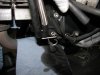
640 viewsSlide the bracket back down (shown here where it comes from), pop the breather back in the loop, then bolt the bracket back onto the engine.
|
|
639 views
|
|
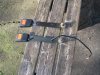
638 viewsThese are the belt latches. I cut the seat belt warning wire from the latch after the photo was taken.
|
|
638 viewsGo ahead and mount the latches. Notice the release buttons face each other!
|
|
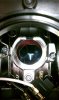
637 viewsLooking down into the bulb housing cavity. The reflector will need to be moved forward just a tad, like a couple millimeters, to clear the taller HID bulb. If you get flickering or the bulb doesn't light up after installing the HID bulb then chances are good that the bulb is touching the reflector and shorting out.
|
|
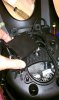
637 viewsThis is how you begin to stuff the electronics into the headlight bucket. Follow along...
|
|
| 3332 files on 167 page(s) |
 |
14 | |
|





