 Most viewed Most viewed |

636 viewsPhoto opportunity in Nyssa (caravan after day 1 show). 22 cars total!
|
|
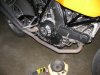
636 viewsPut some blue Loctite on the bolt threads and snug the new cover back on. No need to be a gorilla and wrench down! The blue Loctite will insure the bolts don't back out. Here it is, installed.
|
|
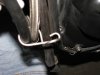
635 viewsHere's both oil lines in the bracket.
|
|

635 viewsBilt Helmet, Fly Racing Youth Barricade Long Sleeve Body Armor Suit (really just an armored mesh jacket), Bilt gloves, and Alpinestars knee & shin armor.
|
|
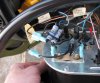
634 viewsAll connected. Use the Bentley wiring diagram to assist but this is basically how it's wired. Remember, you're simply replacing the vibrator with the VR and using a resistor pack in-line with the fuel gauge sender to bring the voltage down to a reasonable level.
+12V (black wire from gauge cluster) -> VR -> gauge -> resistor pack -> tank sender (brown w/black stripe wire)
|
|
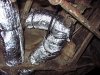
633 viewsI put a scrap piece of insulation (that I removed from the corner) under the split-loom to fully cover the duct.
|
|
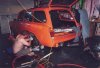
632 viewsPer Lingren spent the week before and after the Invasion at my place. Unfortunately, I had to work during that time so I couldn't show our Norwegian Invasioner much of the area but I was able to have a couple of my friends take him out and show him around. Here he is raising the rear end of my baby in preparation for the Invasion.
|
|
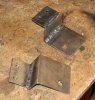
631 viewsBoth of the brackets after fabrication.
|
|
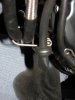
631 viewsBreather line re-installed and bracket re-mounted with both oil lines now inside. Now connect the line to the top of the oil cooler and tighten the bottom connection. The connections are snugged to 24 ft-lbs -- that's not very tight so go easy! Again, use both 19mm wrenches to tighten things. Also, smear engine oil on the O-rings before slipping them into the connector. Make sure the insertion is straight and smooth as you do NOT want to tear or pinch them!
|
|
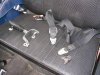
630 viewsThe ugly stock belts and latches are removed.
|
|
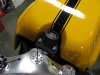
630 viewsI used a scrap piece of the 3M film to make a surround for the body work around ignition cylinder.
|
|
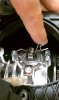
630 viewsPush the retaining clip down and then to the top of the light housing, then pivot it up and out of the way to the left side of the light housing.
|
|
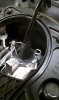
625 viewsHow the HID bulb looks when installed. It can only go in one way so it's pretty easy. Don't do it now as we need to get the electronics installed first!
|
|

624 viewsBella's heartbeat for Mimi.
|
|
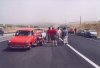
624 viewsJacob looses his autotranny flex plate just outside of Pendelton. Martin is kind enough to drive his Fasty and let the injured Square use the tow.
|
|
624 views
|
|
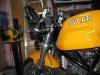
...after.624 views
|
|
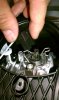
624 viewsThe bulb connector pulls straight off. Notice that it is one unit. The high-beam bulb has one connector on the bulb and a separate one on the bulb holder. The high-beam bulb is also smaller. Thus it's easy to determine which bulb is which. However, to give yourself some additional maneuvering room, you may want to disconnect the high-beam connectors and remove the high-beam bulb as well.
|
|
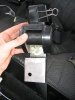
623 viewsThis is the way you would actually do it; mount the retractor first THEN bolt the bracket and lower outside mount to the body. These two bolts should be tightened firmly but not by a gorilla i.e. don't over do it!
|
|
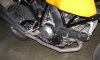
623 viewsHere's my 2006 Ducati Sport Classic 1000, monoposto (single seat), with the stock dry clutch cover.
|
|
| 3332 files on 167 page(s) |
 |
15 | |
|





