 Most viewed Most viewed |
593 viewsRaul taking full advantage of the sleeping space available in his Square.
|
|

590 viewsFits just like the stock unit in my baby! Really, I am more comfortable than I look. Honest :-)
|
|
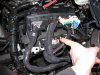
590 viewsHere's the plug to be modified. I found it unnecessary to remove ALL of the plugs per the instructions but you can. Remember to lift the red tab up to unlock the connector.
|
|
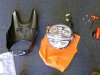
590 viewsAll apart and ready to go! The headlight fairing is two pieces.
|
|
590 viewsShows how the top and bottom parts of the headlight fairing join.
|
|
588 viewsAfter, low-beam.
|
|
587 viewsHallway view.
|
|
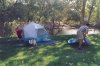
587 viewsMany volks were leaving this day in the afternoon. Here, Maddy helps Peter break camp.
|
|
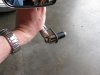
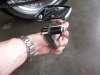
587 viewsThe mirror end assembly. Tightening the Allen bolt pulls the nut in, compressing the rubber sleeve and expanding it outward, providing a tight interference fit inside the handle bar.
|
|
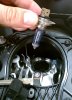
587 viewsRemove the puny OEM bulb. Carefully put it aside and don't touch the glass. You may want to save it as a spare, just in case.
|
|

586 views
|
|
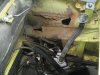
584 viewsLot's of neglect to repair :-(
|
|
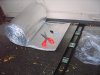
584 viewsMeasure the length needed to be wrapped, add 1/2" to 1" extra, and cut with ordinary scissors. The wrap I used was 16" and it worked well to wrap the circumference of the duct with a little over-lap. Put the over-lap seam down so if water should get in, it will drain out. I had 11" and 8" zip-ties so I used them together to hold the wrap. Snug it down until it just dimples the insulation; don't reef down on it and over-tighten it!
|
|
584 views
|
|
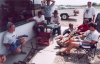
583 viewsKeith Park talks about the front beam that got away Keith's tech session on front beams while Ken (seated with water bottle) panics more and more about his beam.
|
|
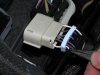
583 viewsUsing needle-nosed pliers remove the tits from inside the plug backing for the #16 and #11 holes. Don't remove the others as they fill the holes in the seal.
|
|
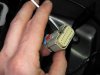
582 viewsNext, use a small screwdriver to lift the inner plug out. It only moves a few millimeters so you don't need to completely remove it!
|
|

582 viewsBefore, low-beam.
|
|
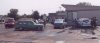
Day 2: Saturday581 viewsThe next day the "prom-queens" wash their rides at a children's car wash. The kids made out pretty good; we paid them $3 and we washed our own cars while they watched and asked a bunch of questions. Funny looking cars with their engine in the back can create quite a few.
|
|
581 viewsClose up of mounting the VR to the back of the gauge body.
|
|
| 3332 files on 167 page(s) |
 |
19 | |
|





