 Most viewed Most viewed |
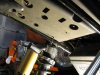
2279 viewsHere's the underside of the seat pan after I drilled through with the 3/16" drill bit. the 3/16" bit fits perfectly in the hole and doesn't touch the threads. You want to drill all the way through the pan!
|
|
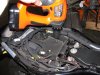
2241 viewsGently and at medium speed, drill a hole through the center. All the way through. You don't need a big drill either, the brass and plastic will drill easily. Go on...do it!
|
|
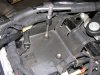
2223 viewsNext, use a 6mm x 1.00 tap to thread the brass and plastic that you drilled through.
|
|
2165 views
|
|
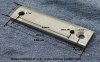
Added: Everything you need to know to mount a MOSFET R/R!2076 viewsHere's the bracket I made from some scrap steel I had. It's 3/16" (5mm) thick. If you use a different thickness just make sure the piece used is thick enough to hold 4 threads at a MINIMUM! You want plenty of fastener thread engagement for the M6x1.00mm tap as that is where one side of the MOSFET R/R will be mounted. The chamfered hole is made with a 17/64" bit and then widened via chamfering. NOTE: Prior to this I had my MOSFET R/R mounted in the stock location with just one bolt and had NO ISSUES with it coming loose/moving.
|
|
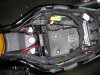
1930 viewsSpace is now available. I'll be using this to house my Dynojet PowerCommander III.
|
|
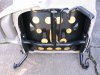
1922 viewsJust a more detailed view of the underside of the seat. Pretty simple!
|
|
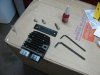
1816 viewsThe MOSFET R/R, painted bracket, and stainless-steel fasteners. Blue Loc-tite is necessary on all three fasteners. The counter-sink bolt uses a 4mm Allen while the two cap bolts use a 5mm Allen wrench.
|
|
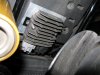
Mounted and wired!1796 viewsThis is how it looks when done.
|
|
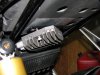
1707 viewsNext, loosely put in the left bolt. This will help keep the left R/R hole lined up.
|
|
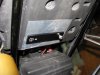
1703 viewsPosition the bracket with the right bolt, having the hole centered on it. Tighten the counter-sunk bolt (left side) into the bracket and seat pan's captured nut. Remove the bolt from the right side.
|
|
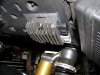
1646 viewsNow insert the right bolt in the R/R and tighten into the seat pan's captured nut. Remove the left bolt, apply Loc-tite (just like the other two fasteners) and tighten it to the bracket. Very snug but not so tight that you strip out the threads in the metal!
|
|
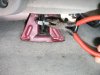
1482 viewsSqueeze stop pin in front of seat (seat fore/aft adjustment guide) to remove.
|
|
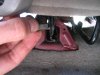
1288 viewsRemoved. Also shows how guide pin lock and lever fit each other (for when you need to re-install seat).
Once the stop pin is removed the seat can be pushed all the way back and removed from the car.
|
|
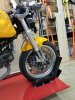
1284 viewsHere is my Sport Classic in the new Derek Weaver vise.
I kept the original wheel stop because it is in a stronger mounting location. Using the supplied DW wheel stop would require mounting it on the vertical strip just under the lift bed. That is welded on and could possibly bend if struck too hard when rolling the bike against it. It would also require drilling two more holes...meh, why bother?
https://www.derekweaver.com/bikers-garage/motorcycle-lift-parts-accessories/w-vise-motorcycle-vise-tire-clamp/
|
|
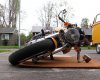
1275 viewsIt's okay, I put her down to show how the sliders work. Unfortunately, the handle bar ends are gonna get bruised so maybe handle bar sliders would be a good idea for those who don't keep the stock mirrors.
|
|

Modeling the helmet1220 viewsI hate it when people review a helmet but they don't show it being worn. So here it is, how it actually looks on a dressed motorcyclist. Please note that I'm not a professional model and my sweetie isn't a professional photographer so this is as good as it gets.
|
|
1210 views
|
|
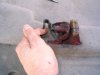
1204 viewsJust a dirty view of the center guide.
|
|
1187 viewsThe smaller screw in place and with thread locker applied.
|
|
| 3332 files on 167 page(s) |
2 |  |
|
|





