 Most viewed Most viewed |
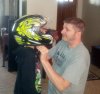
559 viewsTest fitting the youth Bilt helmet. Ronin chose this himself, a black with Day-Glo Yellow...it's even brighter in person!
|
|
558 views
|
|

558 viewsTwo terminal connector comes apart just like the three terminal connector.
|
|
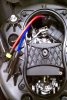
558 viewsThis is how it should look when done. The hard part of this install has been completed!
|
|

557 viewsWhat it looks like in the coat closet.
|
|

557 viewsDrive train balanced on the floor jack and on its way out.
|
|
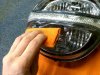
557 viewsThe improved squeegee in action, applying the bottom tint first.
|
|
557 viewsBefore, high-beam.
|
|
556 views...and he's out!
|
|
556 viewsView of the Y-section taken from the left side.
|
|

Side view, both lights covered556 viewsTop and bottom lights covered in lightest tint, LED not covered.
|
|
556 viewsC'mon Dad, let's go ridin'!
|
|

555 views
|
|
555 viewsIndexes all lined up. Ready for the case halves to be mated now.
|
|

554 views
|
|
554 viewsA healthy 6 pounds and 9 ounces.
|
|
Right side554 views
|
|

553 viewsMore carving.
|
|
552 viewsParked at her new home.
|
|
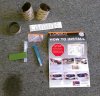
552 viewsComes with everything you see here, including a knife for trimming excess film off and a very nice water mister. Follow the instructions! I did use the sharp knife to trim the mounting tabs off (they're only used for positioning the film). I placed the film closest to the inside edge of the lens (near the center of the headlight) to get the best coverage.
|
|
| 3332 files on 167 page(s) |
 |
23 | |
|





