 Most viewed Most viewed |
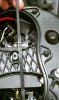
547 viewsIt may not be necessary but I wanted to make sure my ballast wouldn't move around so this is what I did. I cut a notch at the top and bottom of the hourglass brace that the zip-tie would neatly fit in to. This will keep the zip-tie from slipping and thus keep a firm hold on the ballast. A sharp X-acto knife will easily cut through the plastic so operate slowly and carefully.
|
|
Mounting the LED array.546 viewsRemove the bolt that holds the bumper skin to the upper quarter panel (left side shown). It is above the two wheel well screws.
|
|
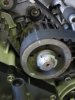
546 viewsLine up the pulley markings with those on the engine case. I used a white grease pencil (china marker) to mark the points on both the case and pulleys for faster visual confirmation. You can see here I drew a line all of the way across the horizontal belt and center pulley as a precaution. I marked the replacement (new) horizontal belt the same way as the vertical belt explained here.
|
|
Cable shifter545 views
|
|
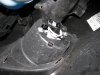
545 viewsRight fog bolted in.
|
|
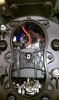
545 viewsDone! I used a piece of wire sleeve tubing (that black ribbed bit) to protect the power wires from rubbing against the zip-tie and hourglass brace. Most likely it's not necessary but while I was in there...just in case....
|
|
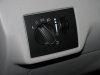
544 viewsStock, non-fog light switch.
|
|
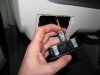
544 viewsNew light switch plugged in. See the red tab? It's in the 'unlocked' position...
|
|
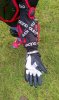
544 viewsUnderside of glove with additional leather for increased abrasion resistance.
|
|
543 views
|
|

Day-time, parking lamp only543 viewsComparison of the two bulbs. On the left is the standard incandescent and on the right is the LED unit.
|
|
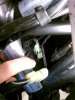
543 viewsPut the electrical connectors back together. They only go on one way so it's pretty much idiot-resistant. The 2-pin goes on first. Notice the positioning.
|
|
542 viewsTommy Fat Cheeks sitting in the hallway opening.
|
|
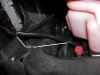
542 viewsWhere I zip-tied the left side of the harness. It comes down near the radiator over-flow container (the pink bottle). Don't use the aluminum object to the left, that's the heat-sink for the coils!
|
|
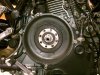
542 viewsEmpty clutch housing, ready for the new unit.
|
|
542 viewsAfter, high-beam.
|
|
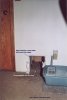
541 viewsBedroom side during construction.
|
|
541 views
|
|

540 views
|
|
540 views
|
|
| 3332 files on 167 page(s) |
 |
25 | |
|





