 Most viewed Most viewed |
520 views
|
|

520 viewsKeith P. learning that the Darkside can have cool power, comfortable riding and smooth handling (Keith also drove my car earlier).
|
|
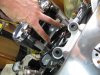
520 viewsMy fingers are pointing to the two pins that fit into the two rubber grommets that are part of the upper triple tree (visible in the foreground).
|
|
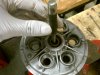
520 viewsUse a drift to tap out the push rod.
|
|

520 viewsFor safety I wrapped each connector in electrical tape and then wrapped them together as well.
|
|

519 viewsMommy talking to Bella about her new brother.
|
|
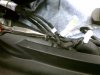
519 viewsRemoving the one-way retaining washer is a pain in the butt. Chances are very good that you could end up breaking the pin...not that it's a big deal if that happens, honestly. I did this on the left side to remove the turn signal electrical connector away from the rest of the harness, then pushed the retainer back on.
|
|
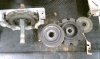
519 viewsLeft to right: Rear of gear box with rearward ring, laying on table is planetary ring, behind that is the forward ring, and behind that is a thin plastic washer.
|
|

518 views
|
|

518 views
|
|

518 viewsRonin getting checked out in NICU (baby intensive care). Blood sugars a tiny bit low but that's all.
|
|
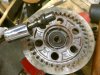
518 viewsThe end result, push rod out.
|
|
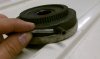
518 viewsI ground the planetary pin level and then drilled a 3/16" hole in it to a half-inch depth. I got a piece of 3/16" rod from the local hardware store, beveled the edge, then pushed it into the hole.
|
|
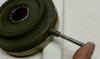
518 viewsThe new pin in the hole, ready for welding.
|
|

517 views
|
|
Cable shifter517 views
|
|

517 viewsDuring our caravan towards home, with the T3's mixed within traffic, I was transported back to my childhood days when air-cooled Volkswagens were more prevalent. There were moments when I was swept up in nostalgia and the many trips our family made…"I have to go to the bathroom!" and "Are we there yet?" whispered in the air that enveloped our air-cooled time-machines.
|
|
517 viewsNow the bar-end mount is up two inches at 34" high.
|
|

516 views
|
|
516 viewsDetail of the bottom of the unbolted ladder.
|
|
| 3332 files on 167 page(s) |
 |
30 | |
|





