 Most viewed Most viewed |
506 viewsDave Hall can't bare to watch the Venetian blind install :-)
|
|

506 viewsUse a Phillips screwdriver to remove the retaining screw at the bottom of the headlamp. No need to completely remove the screw, just until it becomes loose & wobbly.
|
|
506 viewsWith the horizontal (front) cylinder belt removed I lined up my replacement belt for the vertical cylinder and marked it.
|
|
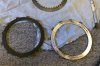
506 viewsThis is the outer-most friction plate and driven plate. The average thickness of the friction plates was ~2.8mm. They should be replaced if they are less than 3.2mm!
|
|
506 viewsWhile I was "in there" I decided to change out the O-rings at the other end of the push rod.
|
|
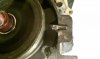
506 viewsRepaired pin cut, ground further, and beveled. Fits in the hole nicely! Remember, the planetary ring will move side-to-side so make sure the pin isn't butted against the end of the hole. Allow for the movement.
|
|
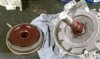
506 viewsBearing grease (red) applied on the planetary teeth for mating to the rearward gear. I followed the instructions for the "new" teeth so I hope this is okay for the "old" teeth. I think it should be.
|
|

505 views
|
|
505 views
|
|
505 viewsHome-made gasket made from 1/32" rubberized gasket material from the FLAPS.
|
|
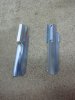
505 viewsHere's what they look like. A simple and effective design. Here's where you can get 'em:
http://www.bhpbikeparts.co.uk/content/products/
|
|
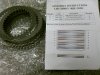
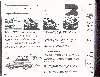
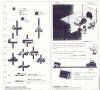
505 viewsThe new clutch pack and stacking instructions. No idea what the bottom image is for, I just used the top part.
|
|
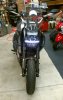
With film applied.505 viewsRunning light on.
|
|
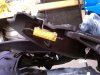
505 viewsThe right side mounted. Easy. It hides under the seat base and is away from the seat edge, thus touching nothing.
|
|
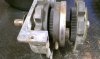
505 viewsCloser-up. Exploded view. Notice pin is short...it came to us broken.
|
|
504 views
|
|
504 views
|
|

504 viewsRuss and Jim A. sit patiently in the shade while John Jarenson gives his tech session on composites. The goober pointing at the table is none other than Brian Fye, the master-mind behind the T3 Invasion!
|
|

504 viewsPer in my baby while I enjoy Brian's Fasty.
|
|
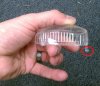
504 viewsThe red circled part shows why the lens needs to be angled out when removing it. That hook helps hold the lens in to the housing. The end opposite the hook is where the screw goes.
|
|
| 3332 files on 167 page(s) |
 |
33 | |
|





