 Most viewed Most viewed |

489 views
|
|
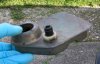
489 viewsUnderside of breather showing PCV (positive crankcase ventilation) valve, part number 022 115 542. Again, home-made gasket between breather and white retaining nut.
|
|

489 viewsCleaning, medicating, etc.
|
|

Day example.489 viewsDay time demo. Also on YouTube.com at http://www.youtube.com/watch?v=Sr75SJdNsJQ&feature=relmfu
|
|
488 views
|
|
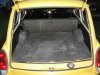
488 viewsVery nice cargo mat with only one small rip.
|
|
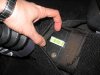
488 viewsSpirit-level on the shift plate on the shift tunnel to show how much my car is raked. As you can see, it's very mild so the engine is pretty close to the same level as the pan.
|
|

488 views
|
|
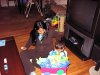
488 viewsBack at home with the Almquists.
|
|

487 views
|
|

487 viewsBella trying to hack into my computer. BTW, that was her burping...not me :-)
|
|

487 views
|
|

487 viewsGrandma Mimi drying off the Li'l Monkey.
|
|
487 views
|
|
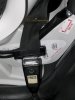
487 viewsClose-up of the belt locking clip. The seat belt tongue just clears the steel bar of the car seat. Notice how far down the car seat is in the 914 seat. The seat belt locking clip holds the car seat down so it won't tip during tight corners!
|
|

The whole gang!487 viewsBack row (left to right): Roger, Haven, Hava, Norman, Eli', Annie, and Morgan
On Couch (left to right): Alex, Maria holding Ronin, Karl, Magaw, Gransax, Kerby, and Steve
|
|

Day 4: Monday487 viewsHeaded home with Brian and Shannon's dog, Monk.
|
|
486 views
|
|

486 views
|
|

486 viewsSeeing if my Bosch fuel injection tester works, using Lawrence's Square as a guinea pig. How the unit is interfaced…
|
|
| 3332 files on 167 page(s) |
 |
38 | |
|





