 Most viewed Most viewed |
486 viewsSeat the wiring gasket as so...pretty dang obvious. How it should look.
|
|

486 viewsComparison of the incandescent bulb (left) and the LED replacement (right).
|
|

485 views
|
|
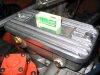
485 viewsSpirit-level on breather to show that it (along with my engine) is at a slight angle. Thus, oil will drain back down into the case through the breather stand (the tower the breather is bolted to).
|
|

485 viewsBrian S. givin' the dub luv. This is a strong, smooth ride!
|
|
485 views
|
|

In the raw comparison485 viewsComparison of the two bulbs. On the left is the standard incandescent and on the right is the LED unit.
|
|
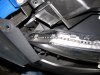
485 viewsShowing the path of the LED array as it goes down on the front part of the head light. That blue thing is simply a nylon auto trim tool I had laying nearby that I used to hold the fascia away from the head light so I could work with both hands. Now just apply power from the turn signal tap!
|
|

484 viewsEntrance to our room upstairs.
|
|

484 viewsBoth of us just passed out.
|
|

484 viewsMaking space for mother to meet son.
|
|
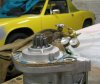
484 viewsAnother shot & ready to go into the yellow 914 you see in the background :-)
|
|

484 viewsThis picture explains what mere words cannot: What driving a Volkswagen is all about.
|
|

484 viewsKeith changing his Square's oil at Toby's Garage. What a sleeper-car it is, a DARKSIDER in sheep's clothing! :-)
|
|
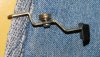
484 viewsIn case you drop the parts, here's how the bits go together. The washer goes on the screw and then the screw goes into the lever and the bushing. The flat side of the bushing faces the thumb pad.
|
|
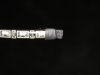
LED dual-element array (alternating white and amber LEDs).484 viewsCut the other end to the desired length or to simply remove the other wires. Use some heat-shrink at the end to seal it from the elements. I left a little over-hang and then bent the heat-shrink back on itself, then gently clamped with some needle-nose pliers.
|
|

483 views
|
|
483 views
|
|
483 viewsLined up.
|
|
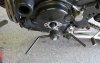
483 viewsThe turning tool screws in snugly and easily lets you rotate then engine to get the pulleys to TDC (Top Dead Center).
|
|
| 3332 files on 167 page(s) |
 |
39 | |
|





