 Most viewed Most viewed |

478 views
|
|

478 viewsRelaxing.
|
|
478 viewsI used a Q-Tip to assist greasing the whole lifter channel.
|
|
478 viewsGrill master Peter Parker in action!
|
|
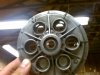
478 viewsOutside of OEM pressure plate, looking at the spring perches. See the light coming through? All but one of them had worn through.
|
|

477 viewsHappy Trini Girl all done decorating.
|
|

477 views
|
|
477 views
|
|

477 viewsExcuse me please, I'm going to get more.
|
|
477 viewsRight side showing locating pin and hole.
|
|

477 viewsThis shows just how much the head lamps are angled on top. The left side has the LED array far back (towards the engine) whereas on the right side I wasn't as accurate and the LED array is about 3mm-5mm more forward (away from the engine). This clearly shows how the lip on the head lamp disburses the light. The left side is what I was originally looking for so I should've been more patient when installing the right side. Experience gained.
|
|
476 viewsFirst layer under right front carpet, foam padding like the rear but bonded to a protective rubber(?) sheet.
|
|
476 viewsMy rebuilt tranny still had oil in it. But tipping it on it's bell-housing would let the oil leak out the breather port. So I pushed a plug into the hole on the breather and securly zip-tied it. Worked perfectly to hold the oil in while I swapped tail covers.
|
|

476 viewsA good omen...a Porsche Cayman below us. Or else the world's fastest ambulance!
|
|
476 viewsClose-up of the inside. The bottom edge of the vent is about 5mm from the bottom of the breather.
|
|

476 viewsI love baths!
|
|

475 viewsThe start of a beautiful, Oregon day! Looking out the window of the delivery room.
|
|

475 viewsRear seat folds out into a bed with room for two adults.
|
|
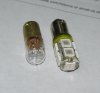
475 viewsClose-up comparison of the incandescent bulb (left) and the LED replacement (right).
|
|
...after.475 views
|
|
| 3332 files on 167 page(s) |
 |
41 | |
|





