 Most viewed Most viewed |

472 viewsRoni helping mommy load the dishwasher.
|
|

472 views
|
|

472 views
|
|

Fingernails help here.472 viewsPut your fingers between the headlamp bucket and the chrome headlamp ring and pull the bottom of the headlamp out. It only needs to travel a centimeter or two for it to be free. Unhook the top and carefully lay the headlamp on the fluffy towel you placed on the fender (that's a hint).
|
|

472 viewsThe parking lamp simply pulls straight out. It's a friction-fit retention assembly.
|
|
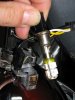
472 viewsHere's the LED replacement, ready for use.
|
|
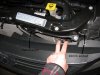
Left side shown. Right is just like the left side.472 viewsAfter removing the bumper skin fasteners remove the 10mm bolt and pin retainer. Do this for both sides (remove all fasteners). This will allow the front fascia and bumper skin to be pulled back enough to get to the head lights. The bumper is still attached to the vehicle by lower fasteners but for this situation it doesn't need to be fully removed.
|
|
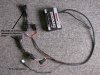
472 viewsThe PCIII-USB and the extensions completed, ready for installation!
|
|
471 viewsWatching the tree get decorated really pooped me out (Brittany).
|
|

471 viewsMy hand on Bella.
|
|
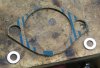
471 viewsSolution: 1/8" cork gasket with a 1/16" stainless-steel washer under each mounting ear. This is a spacer, not really a gasket. The gasket material is used to hold the washers (well, along with some Gas-A-Cinch) and help prevent the mounting ears from getting torque stress during starting.
|
|

471 views"Hey Dad, quit bogartin' the brew!"
|
|
471 views
|
|

471 views
|
|
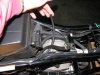
471 viewsI'm holding the hose that I'm going to merge and thus remove. The one near the bottom of the picture with the brass hose clamp is the hose that will remain and thus serve as the bleed and drainage line.
|
|
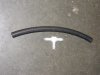
471 viewsWhat you need: A barbed "T"-fitting that's 1/4" at each end. I used an 8" piece of fuel line instead of cutting the original drainage hose.
|
|
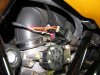
471 viewsRight side of the engine showing the two connectors for the front (horizontal) cylinder injector. The ORANGE wires from the PCIII go here.
|
|
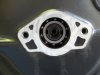
471 viewsRemove the center cover on the left side to expose the end of the crank. This is what you'll see.
|
|
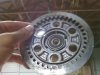
471 viewsSame thing, just a view from the back side.
|
|
Reference shot471 viewsRear mounted gear box. On left side of trailer looking to the right side.
|
|
| 3332 files on 167 page(s) |
 |
43 | |
|





