 Most viewed Most viewed |
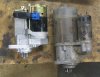
465 viewsComparison of the high-torque HPA starter on the left vs. the stock unit on the right.
|
|

465 viewsMe snorkeling. Well, trying to. The visibility was really poor this time due to the after effects of a storm that occurred near New Zealand a few days earlier.
|
|

465 viewsPicture of A's ring on our way back to the car. As we walked the path the air was heavy with the foreign smell of ripened fruits on the trees and decaying ones one the ground.
|
|

465 views
|
|

465 viewsThe rear suspension is twist-tied to the exhaust. Delicate procedure to remove it. I didn't see its purpose. The rear stand is 100% functional.
|
|

464 viewsPregnant Trini Girl preping the tree.
|
|
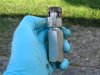
464 viewsClose-up of the internal pipe wrench, cam gear in the neutral position.
|
|
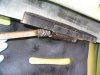
464 viewsUsing a wire brush to clean the channel.
|
|

464 views
|
|
464 viewsKarl showing Ronin how to vacuum.
|
|

464 viewsYes, the Scooby-Doo bobble head came with the camper :-)
|
|

Lahaina Coolers restaurant464 viewsOur last tropical breakfast. Good food and big portions. http://www.lahainacoolers.com/
|
|
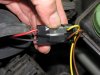
464 viewsThe plug wouldn't lock into the stock connector so I used a supplied zip-tie to bind it and electrical tape to keep it together. Notice that the RED wire mates with the YELLOW (+12 volts) bulb connector wire and the BLACK wire mates with the BROWN (ground) bulb connector wire.
|
|
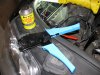
The install464 viewsLiquid electrical tape used to fill in and insulate crimps. High-quality ratcheting crimpers make the difference!
|
|

463 views
|
|

463 viewsMommy makes me laugh!
|
|

463 viewsStrike a pose.
|
|

463 viewsI think the only reason Raul came to the Invasion was to catch up on some long-lost sleep :-)
|
|
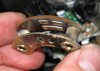
463 viewsThe female part of the sliding switch for the high/low beam switch. The long pad is the common power and the right pad is low beam, the left pad is high beam (as pictured here).
|
|
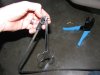
463 viewsSlipping the boot past the end of the wire can be a little tricky so hemostats are helpful in pulling. Remember to use some WD-40 to help lubricate the wire. The blue crimpers have an MSD die in them for crimping the connectors to the wires.
|
|
| 3332 files on 167 page(s) |
 |
46 | |
|





