 Most viewed Most viewed |
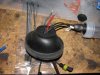
451 viewsHere's the rubber boot turned inside-out to get a better view of the inside of the gasket and the wires running through it.
|
|
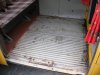
451 viewsClose-up. The black plastic plugs are for seat belt mountings. The attachment points for a 2-person or 3-person seat are there in the middle, just waiting to get used :-)
|
|

Night-time, parking lamp only451 viewsComparison of the two bulbs in the dark. On the left is the standard incandescent and on the right is the LED unit.
|
|

Fuse tap!451 viewsThis is how to easily and safely tap into some power without compromising the stock wiring or running a long lead through the firewall. I cut the bullet connector off so I could pass the wire through the grommet hole and so I could use one of my own spade connectors. To be on the safe side, make sure the fuse tap can handle 25A to 30A minimum. A 10A fuse tap won't work! The bottom slot is for the placing the stock fuse while the top is for the accessory and thus the red wire leading from the fuse tap.
|
|
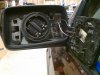
451 viewsWhat the interior looks like. I set the mirror so it was centered in the housing. I started at the 11 o'clock position and worked my way anti-clockwise (aka counter-clockwise), gently prying the mirror clips away from the ring mount.
|
|

450 views
|
|

450 views
|
|
450 views
|
|
450 views
|
|

450 viewsOkay, a little friendlier now :-)
|
|

450 views
|
|
450 views
|
|
450 viewsOwner standing next to her sexy, slinky car.
|
|

450 viewsThis is my startled look!
|
|
450 viewsBella makes the car look BIG.
|
|
450 viewsI will close the door, Daddy!
|
|

450 viewsUncle Roger, Kerby after the girls got ahold of her hair, and Aunt Joanne.
|
|

450 viewsThis is Bella. She's cute too but out grew her flirting stage. Now she just pushes boys down.
|
|

450 viewsLi'l Monkey ready to spend Christmas Eve with Craig & Family.
|
|

450 viewsSomeone got Mommy's scowl.
|
|
| 3332 files on 167 page(s) |
 |
54 | |
|





