 Most viewed Most viewed |

439 viewsFold out table.
|
|

439 viewsBefore - Low beams and fogs, standing next to the B-pillar and looking forward.
|
|
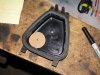
Through the hard cover439 viewsJust an FYI: I do NOT recommend this method! PITA if you have any issues. Go through the rubber cover.
Make a template that is 7/8" in diameter and trace with a permanent marker. Or put a nail or screw into the center of the circle and tap it so it leaves a dimple -- that's where you will drill. I used this location because it gave me the most slack in the wiring. The shop that does this recommended not putting the gasket in the center of the hard cover because there wouldn't be enough wiring slack.
|
|
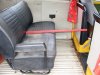
439 viewsThat's a yard stick. There's 15" of leg room there.
|
|

439 viewsBottom of the display box.
|
|
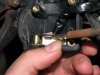
439 viewsWhen putting the female part of the switch onto the male part, make sure the sliding contact doesn't catch on the electrical pads on the female piece. Use a scribe or small, flat screwdriver blade to hold it down as you slide the female part on.
|
|
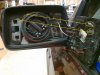
439 viewsTo replace the mirror, the guide pins (red) insert into the guide holes. The spring clips (blue) go into their respective cavities. They don't clip to anything. The tabs (yellow) on either side of the guide pins are what clip to the circular motor assembly in the mirror housing. I gently pushed the mirror in at the 1 o'clock position and pushed the rest of it in slowly in a clock-wise motion, listening/feeling each clip (yellow) catch the ring. Use leather gloves when installing so if it breaks you don't get cut. It takes firm, evenly distributed pressure to seat the mirror.
|
|
438 views
|
|
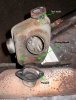
438 viewsAdded flanges to lower muffler-to-heat-exchanger pipes. Was previously "fixed" by welding the muffler to the exchanger. Thin metal sections strengthened where needed (holey) and tack welds added to keep parts from loosening.
|
|
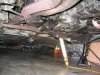
438 viewsShift rod removed from both ends. I later removed it for the install of the new firewall shift bushing as well as pulling the tranny.
|
|

438 viewsMadalyn, Ronin and Lindsay
|
|

438 viewsRonin getting checked out in NICU. 4.09MB
|
|
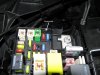
438 viewsGrommet installed. It's low enough that it will not interfere with the closing of the relay box lid. The fuse tap wire is 16 gauge so I used a grommet that had a 5/32" bore and 1/4" x 3/32" groove.
|
|
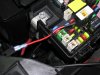
438 viewsWire passed through and new connector crimped on. Fuse tap is ready to replace the M6 20A fuse. I chose this one because it's powered only when the van is on. This fuse is for the #1 ignition switched power plug and rain sensor...our van doesn't have a rain sensor so it's got power to "spare"...heeheehee.
|
|
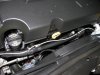
438 viewsRouting the power feed wire along an existing loom.
|
|
437 viewsAfter a hard day of posing there's nothing like sucking down on a good binkie -- a finger just won't do!
|
|

437 viewsVery nice interior.
|
|

437 viewsMommy toesies :-)
|
|
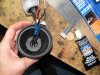
437 viewsViewing inside after applying the RTV.
|
|
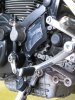
437 viewsPrettier.
|
|
| 3332 files on 167 page(s) |
 |
60 | |
|





