 Most viewed |
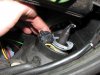
435 viewsWhatever plug you may have, simply push the connectors into the gap on the inward side of the light housing as this has a good gap to hold it out of the way.
|
|
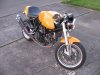
435 viewsDamn she's a fine looking ride! Protectors mounted.
|
|

435 views
|
|

435 viewsJust after sunset. At the time I took these pictures it was brighter out than what appears in the images. The LEDs are bright enough to the camera that it used a faster shutter speed, thus making the image look darker than it really is.
|
|

435 viewsWith low beams on. Very visible from the sides.
|
|

435 views
|
|

434 views
|
|

434 views
|
|

434 viewsAnother group shot.
|
|

434 viewsFirewall bushing for shift rod. The white one on the left is the new unit and the black one on the right is the original.
|
|

434 views
|
|
434 views
|
|

434 viewsIf you don't stop taking pictures of me during bath time, you're gonna be eating that camera, Bub!
|
|

434 viewsAdam "Z Chef" working the Evo.
|
|

434 views
|
|

434 viewsProfessional pictures (well, we paid for them) of da family. This is Ronin. He's cute and likes to flirt with women. Not girls...women!
|
|

434 views
|
|

434 views
|
|
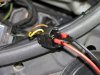
434 viewsThe bulb I originally had for the left side was bad so I got a replacement. This had the wires through it but no connector. Overall, it is better as there was no need for me to cut the wires, push them through the gasket, and butt-crimp them. For the connection, I pushed the spade connectors into the stock connector, dabbed liquid electrical "tape" around it to electrically insulate it as well as help hold the connectors, then wrapped the connector in electrical tape to further hold the connectors in. Not ideal at all but it works.
|
|
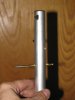
434 viewsThe end result of the drilling. Yes, the hole is perpendicular.
|
|
| 3332 files on 167 page(s) |
 |
62 | |
|





